Uncategorized

  • Without proper mobility in the hips and ankles, squatting exercises can be challenging, and uncomfortable.

    Today, we’re going to show you a simple test to determine whether or not your ankles are the limiting factor in your squat and 3 easy exercises to fix your squat if they are.

    The Ankle Dorisflexion Test

    The first step in the test is to lay out a ruler perpendicular to a wall and lay your foot on the ruler. Keeping your heel planted, you’re going to try and drive your knee to the wall keeping your femur in line with the foot.

    If you’re able to touch the wall with your knee, you’re going to move your foot slightly back and rest again.

    Continue this process until your heel starts to lift up off the ground as your knee approaches the wall and take your measurement.

    It’s important to take note of where you’re feeling tension during the test. You’re either going to feel it in the front or back of the ankle.

    Interpreting the Results

    Average Result for males: 5 1/2 inches.

    Average Result for females: 4 1/2 inches.

    If you’re above that average, your ankles are good to go. However, if you find yourself below the average result, your squat will greatly benefit from some added ankle mobility exercises in your routine.

    The exercises prescribed below depend on where you felt that tension during the test, so keep that in mind when planning out your mobility routine.

    Ankle Mobility Exercises

    These first three exercises are going to be for the folks who felt the tension in the front of their ankle when they came up short during the dorsiflexion test.

    1. Toe Squat

    Contrary to what you may believe, squatting on your toes is actually a great way to build awareness for squatting with a vertical spine.

    We aren’t telling you to load up a barbell with 90% of your one-rep max. That’s just silly. Start by adding a couple of sets with just your bodyweight into your warm-ups and reap the rewards.

    2. Squat Hold

    The second exercise you can add is to simply accumulate time in the bottom of the squat. You can start by accumulating 30 seconds and eventually build up to 2 minutes.

    Once you find yourself holding that position for 2+ minutes, add an empty barbell to your back.

    This is going to elongate the ligaments in the back of your ankles and loosen up and un-impinge the front of your ankle.

    3. Foot Drills

    These foot drills are great to increase proprioception and strength across the ankle. You’re going to measure out a 25-meter distance and walk in the following foot positions:

    • Outside blade of the foot
    • Inside of the foot w/outside off the ground
    • Pigeon toed
    • Duck footed (Click here for another great ankle mobility drill specific to weightlifting)
    • Backward on the balls of feet
    • Heels of feet

    This final exercise to be added in addition to the previous 3 if you felt the tension in the back of your ankle during the dorsiflexion test.

    4. Eccentric Dorsiflexion

    Hop up onto the edge of a 3.5 – 4″ thick bumper plate and come all the way up to your full range of plantar flexion. Then, you’re going to lift one foot up and slowly let the supported foot down as far as it will go. Once you get to the end range, drive that same supported knee forward and hold for another second.

    The key to this drill is to really focus on the eccentric portion or the lower of the exercise in order to pull apart those muscles and tendons that are stuck together at the back of the calf.

    A beginner’s prescription for this drill is 3 sets of 10 reps per side. If you feel soreness a couple of days after the drill, that’s perfectly normal. This will get better over time as you start to adapt. If the soreness lingers around for over a week, you’re going to want to scale back the total volume.

    Now that you know whether your ankle is limiting your squat, it’s time to put in some work and add a few hard-earned pounds to your lifts.

    If you’re looking for more exercises, skills and drills for increasing strength and mobility in your ligaments and tendons, check out our unmatched Gymnastics Program.


  • If you don’t create a strong foundation, you’re setting yourself up for failure. In this presentation, Head Gymnastics Coach, Nick Sorrell, walks you through our organized system for building the ultimate base of athleticism.

    If you want to see this system in action, you’re in luck! We have a FREE 3 day video series that breaks down our unique formula and delivers it straight to your inbox.

    Whether you’re looking to get your first muscle-up, or build your capacity in time for the Open, this series will show you how to get the most out of your skill work.

  • THE GOOD OLD DAYS

    Let’s take a trip down memory lane.

    The 2014 CrossFit Games season had just come to a close, and the podium finishers are all lined up ready to be interviewed on a full year of training.

    Here we have Jason Khalipa (3rd place), Matt Fraser (2nd place), and Rich Froning (4x CrossFit Games Champion) being asked a question that many coaches and athletes are still trying to fine-tune today.

    “How much time do you spend training each day?” asks the interviewer, with each athlete proceeding to give a vastly different answer than the previous one.

    Khalipa says anywhere between 2-4 hours, that he gets the workouts in when he can at the gym and does extra work at his own home.

    Fraser replies that he trains 1-2 hours a day, stating clearly, “I have a real job.”

    And then we all know how Rich trains: typically 6-8 hours a day he is doing something to increase his fitness level. This could include skill work, playing hockey, or heading out for a mountain bike ride with his buddies, but for Rich, training is a lifestyle – all day “ereday”.

    Now obviously our sport looks quite different 7 years later.

    FAST FORWARD 7 YEARS

    Khalipa has officially hung up the competition belt, Rich has transitioned to team competition where he’s proceeded to dominate every year outside of 2017 (courtesy of our very own Wasatch Brutes) and Fraser’s “new” full-time job is training for his 6th CrossFit Games Title.

    In order to be at the top, you need to train and recover like it’s your job, plain and simple.

    However, with the announcement of the 2021 CrossFit Games season and the all-new Quarterfinals competition, those athletes that aren’t quite ready to give up their lives and their first born to compete at a higher level than the CrossFit Open now have a chance to throw their hat into the ring.

    This brings us back to an important question; What should YOU be doing to break into the top 10% and advance to the next round of competition.

    As a training athlete, should you be doing more workouts? More skill work? Learning to play new sports…more often? More metcons in a day? OR should you be doing less better?

    Should you instead do 1 workout a day and attack it like there is no tomorrow? Maybe have 1 skill per day you focus on with all your heart in order to maximize the results?

    How about instead of always building to a heavy snatch/clean and jerk followed by some accessory strength lifts and then a metcon followed by some intervals (If this sounds like you, you might want to READ THIS)..you simply warm-up, do skill work for the metcon and hit it, no holding back, no pre-fatigue.

    There are a couple of ways we can tackle this beast head-on. Let’s take a look from both sides.

    The Volume Approach

    There are advantages to working out more often than others, period.

    Increased work capacity, increased ability to recover. You will be able to finish 3-4 day competitions better than your lesser-trained competitor.

    You will have had more exposure to unique combinations of movements, modalities, time domains, you name it.

    But how hard are you really able to train during your 5th hour of the day? Do you ever find yourself saving just a touch of energy because you know something is coming next? How about on your AM1 strength session for your Olympic lifts – do you leave out 1 or 2 more attempts on your clean and jerk that may be your breakthrough reps in order to save up for the AM2 session of front squats?

    Does all the volume actually slow your body’s ability to respond to proper strength training, therefore slowing/blunting potential GAINZ?

    An even more applicable question is, in your PM1 session at the track, do you let off the gas just a touch in order to save yourself for your evening metcon because that is more “important?”

    Maybe you don’t even make the standards for your run paces due to the fatigue from your earlier strength session. In that case tell me, what was the purpose of the track anyways?

    Just to do more because “more is better,” right? Well, of course the fittest men and women on earth train each day, hours on end, so that is what you must do to become great.

    Wrong.

    If you want to be like the best, you need to speak with the man upstairs and see if he will allow you to choose new parents, so let’s stop the madness of “Well Matt or Tia does it…”

    CrossFit was founded on the unique principle that intensity is what sets us apart from others, and what will make each of us great in our own abilities.

    A ton of volume earns you a big engine and a smooth-and-steady pace through workouts (learn how greater amounts of volume can actually improve your ability to perform shorter metcons HERE), but will that be enough to be great going forward?

    The Intensity Approach

    Intensity is the independent variable most commonly associated with maximizing the rate of return of favorable adaptation. In short, intensity gets you what you want. It’s where the magic happens!

    Let’s look at what it may look like to train for 1-2 hours a day as a high-level athlete.

    You walk into the gym, your warm-up lasts 15-20 minutes, and the next 10-15 minutes are spent doing skill work for the movements that will be included in the conditioning session, along with some gymnastics static holds and positional work.

    You then spend the next 35 minutes hitting a few heavy clean and jerks and then getting through a series of heavy front squats.

    Following that, you begin the metcon that lasts 6-10 minutes, followed by a cooldown of 10 minutes. A lot can be accomplished in a short amount of time, right? And your ability to get it done in such a short window allows for a long recovery between sessions from day-to-day.

    The primary advantage is that time spent in the gym is short and you can leave everything you have right there in that specific session. You visit the dark place in those 6-10 minutes of your metcon knowing that you are there to maximize effort, mental toughness, and physiological thresholds to the point of muscle failure.

    No breaks, no saving energy – what you have, you expend it.

    What else do you get? Speed! Something that competitors in our sport generally overlook is the value of going extremely fast for 3-6 minutes.

    Why?

    Because it hurts, really, really bad, but a workout that comes up like that at a competition or the Games is worth just as much as the 12-15 minute chipper, is it not?

    What else do you avoid by getting in, training, and getting out? Less mental fatigue.

    You hear about it all the time from competitors: “Oh I’m just feeling burnt out, I don’t even know if I want to compete this year, it is so stressful/time-consuming.” Well chill out bro, maybe workout a bit less, and enjoy what you do.

    But then the question still remains, are you doing enough?

    Ok, so you worked out really hard, but most competitions are still 3 days long, and many of them include 3 workouts each one of those days. We all know that the Games have now grown to weeklong events consisting of 13-14 workouts or tests.

    Can you prepare for something like that by only training 1-2 hours a day? What will happen to your body after 2 workouts that you’ve given it your all on? How will you respond to warming up, working out, cooling down…..3 separate times throughout 1 day? And then how about doing it again tomorrow or the next day?

    Not to mention against athletes pushing you past your normal physical tolerances of your home gym.

    Yes, this is a more traditional “Old School” CrossFit, but this is now a highly rewarding and competitive sport!

    What about your running and rowing? You only hit 1 gymnastics skill today, what about the others? You just saw someone post on Instagram that they hit 6 workouts today, aren’t they going to be better than you now?

    Did you do enough?

    HOW DO YOU KNOW?

    Fact is, there is more than one way to skin a cat. With this “Sport of Fitness” there are a bajillion and one ways (literally, and yes I said that).

    Do you want Intensity? Yes.

    Do you want volume? Yes.

    How do you balance it? That is going to be up to you and how you can fit your training into your life. I would also encourage taking an even deeper look into your athletic history, your age, your current strengths and weaknesses, your durability, how well you recover, your current stress levels, how well and how much you sleep, your nutrition…and the list goes on.

    All of these things should influence how you train day to day, cycle to cycle, and year to year. If you need work on how you perform in the open, focus on INTENSITY like it is your job. If you are a Games athlete that looks around on day 4 and sees yourself getting passed or left behind by lesser athletes, then maybe you need to look at your training volume and make some increases at certain times.

    If you have no idea where to start, if you don’t know if you are training too much, or not enough, assess if you are improving.

    If the answer is yes, you are doing good things. If you don’t know where to go for guidance or what to do, how to break up sessions, how often to do double or triple days, and how often to just do a good old CrossFit.com main site workout and walk away, then you should seek out help.

    Here at Brute, different athletes are on different programs.

    Some train multiple times per day every day and some train once. Different athletes need different things, and it is up to us to help guide you in the proper direction.

    If you’re one of those athletes that have their eyes on one of those quarterfinal spots but also want to maintain a quality life outside of the gym, Brute Compete is right up your alley.

    Each training day is a highly focused 90 minute or less training session that targets your weaknesses with the intention of peaking you for Open style competition.

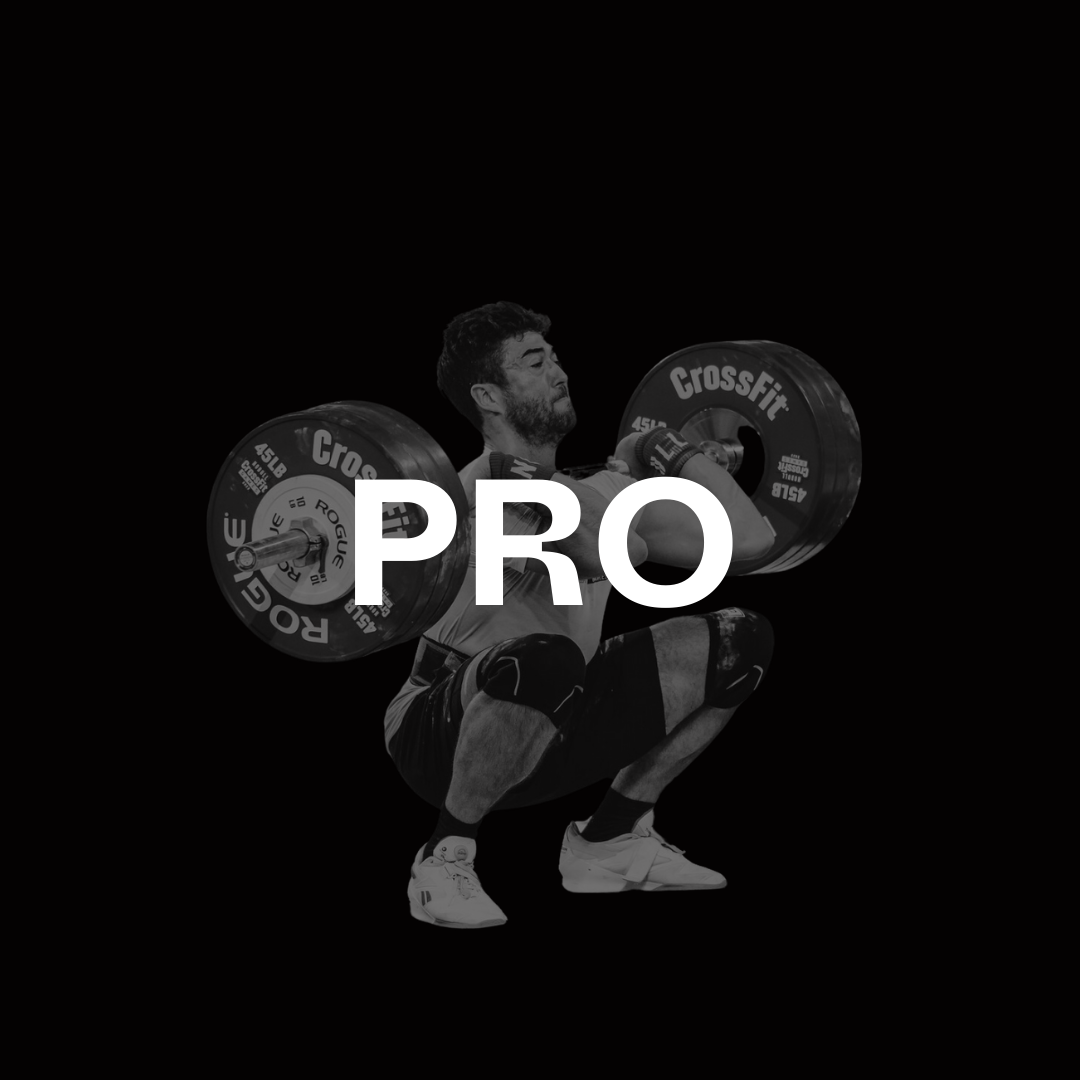
    If you’re looking to take it a step further and join the best of the best, check out Games Prep or even consider hiring one of our 1-to-1 Coaches. They’ve collectively sent over 100 athletes to the CrossFit Games and even have a few championships to show for it.


  • Want to become more efficient in the Snatch or Clean & Jerk?

    Whether you’re training for a meet or cycling lightweight barbells for time, you’re going to want to nail your positions in the pull in order to use less energy and generate more force.

    In the video below, head Olympic Weightlifting Coach, Matt Bruce takes you through each of the 3 phases of the pull in both the Snatch and the Clean & Jerk.

    PHASE 1

    The first pull can often be one of the trickiest parts of the lift to master for newer athletes. 

    In this phase, the athlete is building tension in the hamstrings in order to generate the most force in the other two phases.

    It requires patience and a lot of posterior strength to execute correctly. If you’re gripping and ripping, you’re literally setting yourself up for failure.

    This portion of the lift starts at the mid-shin and ends at the knee.

    • Hips and shoulders should move at the same rate
    • Shoulders should remain over the bar
    • Back angle remains the same

    PHASE 2

    In phase 2 of the pull, you’ll notice the athlete’s back angle begin to change.

    The major key to executing this phase correctly is keeping the bar nice and close. If you let the bar drift out in front of you, it’s going to make the weight feel much heavier.

    This position of the lift begins from the knee and ends when the bar is in the crease of the hip (also known as the power position.) 

    • Hips move slightly forward
    • Bar is swept backwards 
    • Bar should be kept as close as possible (brushing the thighs)
    • Back angle becomes more vertical

    PHASE 3

    The final phase of the lift begins in the power position, where the athlete will then perform a “jump shrug”.

    When timed correctly, the hips should scoop just underneath the barbell, generating the maximum amount of force possible, while keeping the bar close. 

    This scoop should resemble more of a vertical jumping motion, not an aggressive humping motion – (although there is a time and place for everything.) 

    This portion of the lift starts at the hips and ends with a jump-shrug, or “triple-extension.”

    • Bar is scooped by the hips
    • Should reach triple extension – Knees, hips and ankles fully extended
    • Traps should be fully extended

    A final note on the pull is to create some awareness around the position of your elbows.

    High elbows translate to a stronger pull. An easy cue to keep in your pocket is to keep the knuckles down and the chest out. Think about looking like a Gorilla. Gorillas are strong, right?

    After fully extending in the 3rd pull while visualizing yourself as a big hairy ape, punch the bar overhead and think about pressing into it while stretching it like a rubber band. This will make your lockout rock solid.

    Now that you have the 3 phases of the pull locked in, it’s time to put it into practice. Dial-in those positions with a pvc pipe and when you fell confident, put some weight overhead. It’s go time.

    Maybe you feel like your positions are solid and you just need to build some raw strength to get those OLY numbers up. Our Brute Strength Calculator will quickly calculate how all of your major lifts measure up to each other and give you an accessory program you can use to prioritize your weakest links.

    Check it Out

  • It’s that time of the year again. The time of year where our fitness takes a back seat to our family obligations, travel plans, and all the other stresses that come with the holiday season.

    Traveling in particular can be one of the hardest factors to control when it comes to staying on track with your fitness goals.

    You don’t have access to most of the foods you’d typically eat, or the methods used to prepare them.

    With nutrition playing such an important role in our fitness journey, we’ve decided to come up with 5 of our favorite tips or “hacks” you can use to stay on top of your eating habits so that you’re gravy the next time you hit the road.

    THE 5 COMMANDMENTS FOR ON THE GO EATING

    1)   DROP THE CARBS

    Carbs are certainly most peoples’ favorite macronutrients to eat, but they can be a deadly trap while en route to your holiday destination.

    As our bodies’ primary source of fuel, we look at carbohydrates like a currency – they must be earned. And while you’re in transit, the chances of you expending a lot of energy are slim to none (unless you plan on walking to your destination.)

    A good rule of thumb is to eat like you normally would on a non-training day.

    Stick to low carbs, moderate amounts of fat, and foods high in fiber and protein. Oh…and veggies. Lots and lots of veggies.

    Those should keep you full throughout the day and if you happen to find time for a workout, THEN indulge in some tasty carbohydrates.

    2.) DINE IN FOR BREAKFAST

    Believe it or not, you can win BIG with a good ole’ fashioned diner breakfast.

    Most sit down breakfast joints have some great high protein, nutrient-dense options such as steak and eggs, or a veggie-loaded omelet.

    It’s important to be present during meals. Sit down, chew your food and really enjoy it.

    We guarantee you’ll walk away feeling more energized than if you swung through a drive-through and put away 2 sausage biscuits and a side of hash browns from the golden arches.

    3.) DINE IN FOR LUNCH/DINNER

    If you hadn’t noticed by now, we’re big believers in mindful eating. A commonly overlooked nutrition tip is to actually be present during your meal and to chew your food in order to extract the nutrients from it.

    It’s much easier to just shovel it down when you’re trying to multitask eating with driving and battling your kids in the back seat, but at what cost?

    You simply won’t absorb as many of the nutrients as you could by having a nice sit-down meal with the fam.

    Some basic tips for sit-down dining include:

    • Adding extra protein to your meal
    • Substituting sides for healthier options – ex: french fries for a side salad
    • Avoid dressings and condiments – opt for oil and vinegar instead
    • Say no to anything “loaded” altogether

    4.) CHOOSE WISELY AS FAST FOOD RESTAURANTS

    We understand that eating fast food is simply unavoidable at times, and instead of beating ourselves up mentally, we just have to be a little wiser with our food choices.

    When you’re forced to hit the drive-through you’ll almost always have the option for a chicken sandwich.

    One simple strategy is to replace that bun with a lettuce wrap, and you’ll be in a much better spot nutritionally.

    If the lettuce wrap chicken sandwich isn’t an option, see if you can order a side salad with a couple of chicken breasts. This will provide you with roughly 50g of protein and 2-3 servings of nutrient-dense veggies.

    5.) AVOID GAS STATION GARBAGE

    Gas stations are a haven for junk food enthusiasts. They may even be more dangerous than a 10 piece McNugget meal.

    If you’re looking for the quickest way to derail yourself from your goals, just pop into a 7-Eleven without a plan of attack, I dare you.

    These places carry just about every salty, sweet carb-heavy drink and snack option available to you and you’ve got to stop at some point to refuel or use the bathroom. Talk about temptation.

    They certainly aren’t for the faint of heart. Stick with us and you’ll be fine.

    Here’s a quick and simple list to stick on your dashboard for the next time you find yourself at the pump… and no matter what, DO NOT DEVIATE from the list.

    • Low sugar beef jerky
    • Hard-boiled eggs
    • Tossed salad
    • Dried Fruit
    • Almonds
    • Water

    For more tips, tricks and Holiday Hacks to stay on track over the next few weeks, download our full Holiday Fitness Guide.

    We’ll teach you additional lifestyle techniques and supplementation recommendations to manage stress, holiday meal prep strategies, and give you 16 bonus workouts you can take with you on the go. – Minimal to no equipment required.*

    Download Now

  • Tudor’s early life began much like normal young boys in Washington, playing soccer and wrestling through middle school.  Tudor found CrossFit at a very early age in middle school and started attending classes with his dad.

    Here he fell in love with the competitive nature of the sport and nine years later, became one of the most decorated teen athletes the sport of CrossFit has ever seen.

    Eyes on the Prize

    This competitive fire first started at the age of 12 when he and his family became aware of the teen division in the CrossFit Open.  He knew this gave him 2 solid years to train and earn a spot at the 2017 CrossFit Games in the Teen division.

    2017 was Tudor’s first opportunity after qualifying for the CrossFit Games to showcase his talents where he placed 10th in his inaugural Games in the 14-15 age group.

    From 2017- 2018 Tudor further honed in his training, hiring Brute Strength coach, Matt Torres to help him focus on training his weaknesses with the intent to dominate his competitors the following year.

    In 2018, Tudor did just that, winning the CrossFit Games in the 14-15 age group and capping off the goal he set for himself 2 years prior.

    New Division, Same Goal

    2019 becomes a rebuilding year in the 16-17 year age group where he focussed on getting stronger moving up in the new age division.

    At the 2019 CrossFit Games, Tudor placed 3rd in the 16-17 age group, knowing that the following year would be his year to take home the championship.

    2020, the year of COVID, and so much uncertainty surrounds the CrossFit Games season.  Tudor took second in the Open to secure his spot at the Games, but would there be a Games this year?

    Enter the PIT Fitness Ranch Elite Teen Throwdown

    Due to the cancellation of the Teen event for the CrossFit Games, a new group of motivated CrossFit coaches, athletes, boxes and parents, pulled together to create a new event called the PIT Fitness Ranch Elite Teen Throwdown.

    Their goal was to give the well deserving teens a platform to showcase their talents and still crown the Fittest Teen of Earth.

    All of the competitors were already at a disadvantage with having to train with most of their gyms shut down and having to pull together any equipment they could get their hands on in order to continue training.

    Showing up at the competition, nothing was going to be given to Tudor and it was truly set to be anyone’s game.

    Tudor said much of the experience rivaled the CrossFit Games from the first class treatment of the athletes, to the care packages and the quality of programming and judging at the competition.

    One thing was quite different from the start however, all participants would be bunked together in the same sleeping hall and therefore there was no hiding from your competition.

    You literally woke up, ate, competed, then went back to sleep with all your competitors over the course of the weekend.  This proved in the long run to create a greater bond between the competitors that will remain with them for a lifetime.

    The Events – The Champ’s Approach to Taking the Title

    Event 1a

    FOR TIME:

    SWIM 250 METERS

    RUN 2.5 MILES

    Event 1b

    BEGINS 5 MINUTES AFTER LAST ATHLETE FINISHES THE 1A

    FOR WEIGHT:

    30 SECONDS TO COMPLETE DEADLIFT UNTIL FAILURE

    ADVANCE TO NEXT BARBELL IF COMPLETED WITH 20-SECOND TRANSITION

    WEIGHT INCREASES BY 10#

    BOYS 315-505

    GIRLS 185-375

    Tudor ran cautiously on the trail run due to a previous ankle injury earning 7th place, but came back in a dominating fashion to win the deadlift ladder with a 485 deadlift setting a new PR in the process.

    Event 2 “The Upside Down”

    FOR TIME:

    500M ROW

    50′ HANDSTAND WALK

    20 CHEST-TO-BAR PULL-UPS

    10 THRUSTERS

    500M ROW

    50′ HANDSTAND WALK

    15 CHEST-TO-BAR PULL-UPS

    15 THRUSTER

    500M ROW

    50′ HANDSTAND WALK

    10 CHEST-TO-BAR PULL-UPS

    20 THRUSTERS

    Feeling confident in these movements and knowing it was going to be a race to the finish, Tudor took 2nd in this event.

    Event 3 “MORRIS”

    FOR TIME:

    50 WALL BALL SHOTS (20/14)

    40/30 CALORIE SKI

    30 DUMBBELL SNATCHES (50/35)

    20 BOX JUMP OVERS (24/20)

    15 BAR MUSCLE-UPS

    “Morris” was the last event of the day and was a tribute WOD to Teen CrossFit Games athlete, Jacob Morris, who placed 7th in the 2019 CrossFit Games and passed away 4 weeks after heart surgery and was a beloved friend of all the competitors.

    This event was particularly special and emotional to the group and they all wanted to lay it out there in his memory.

    After placing 3rd in this event, Tudor was working his way up the leaderboard chasing the first place spot held by Anthony Re at the end of Day 1.

    Event 4 Boot Hill Cemetery

    20 D-BALL SQUATS

    200M SANDBAG SPRINT TO TOP OF LND MOUNTAIN

    The start of day two consisted of heavy d-ball squats and sandbag sprints and was by far the fastest workout of the weekend with 1st and 3rd place separated by just 2 seconds. Tudor placed 3rd with Anthony Re placing second, only extending the lead of Anthony Re.

    “It was kind of at that point, I was just thinking about the whole competition as a whole and the way I performed to that point, and I actually wasn’t sitting in first place. I was sitting in second by a few points.

    And I just remember going after that event, I was kind of frustrated with myself and I thought I needed to put more effort in and have that competitive fire. I feel like I let a few people pass me at the finish line or not pass me. They were ahead of me and I tried to make a push but I didn’t have that competitive fire to push past them and just stay in my own space, you know.

    I said a prayer and went into the next event. I just knew I needed to perform well to get myself up in a good place for the weekend.The next event was kind of the turning point for me.”

    In actuality, this was the turning point for Tudor and he went on to dominate events 5, 6, and 7 by winning first in all these events.

    Event 5 Death By Weightlifting

    FOR WEIGHT:

    Max Snatch + Max clean and jerk

    Starting with snatch, 30 seconds to perform lift. If completed, advance to next weight level until failure. Then move onto clean and jerk lift until failure

    Event 6 Strongman Metcon

    FOR TIME:

    Sled pull 100 meters

    Farmers Carry 200 meters w/DB’s

    Paddleboard 300 meters

    Farmers Carry 200 meters w/DB’s

    Sled Pull 100 meters

    Event 7 In a Bind

    150 DOUBLE UNDERS

    10 RING MUSCLE UPS

    5 ROPE CLIMBS (15′)


    5-MINUTE TIME CAP


    Event 8 & 9 Double Trouble A & B

    FOR TIME:


    (A) 21-15-9

    TOES TO BAR

    BURPEE TO RIG


    REST 3 MINUTES


    (B) 9-15-21

    HANDSTAND PUSH UPS

    POWER SNATCH

    14-15: 115/85

    16-17: 135/105

    (2 SEPARATE SCORES)

    In Event 8, Tudor furthered his lead by winning the first portion consisting of Toes to Bar and burpees and placing 2nd in event 9 which consisted of handstand push ups and power snatches.

    Event 10 The Pit

    FOR TIME:

    30 DEVIL PRESS

    60 DB FRONT SQUATS

    *WILL ADVANCE AFTER 5 DP AND 10 FS ARE COMPLETED

    14-15: 35/25

    16-17 50/35

    Going into event 10, Tudor was in the driver’s seat but still needed to hold 2 competitors eyeing for his spot; Anthony Re and Daniel Kuc.

    The last event being a particularly nasty burner consisting of 30 Devils Press and 60 DB Front Squats, Tudor held off with a 3rd place performance to secure the victory and his legacy in CrossFit Games Teen history.

    Over the course of the weekend, Tudor felt that the competition was special, because of the environment that was present there.  Since all the competitors bunked in the same cabin, they all created a special bond and sealed a fraternity that will last long into their adulthood.

    Each night, they would all talk about the events and treated each other as brothers and not as competitors.  Each person cheered the other on and truly was to see their friends succeed.

    Another lamented friendship earned at the Games was with Brute Strength Mental Performance Coach, Lauren Tait.

    During the paddleboard event, Tudor remembers running, finishing the sled drag and running to the dumbbells with Lauren coaching him to calm his breathing and not to panic.

    Since he didn’t have much experience with the paddleboard, Lauren knew he must be methodical in this workout to succeed.  This tactic worked, placing him in 1st and also further creating another relationship he will cherish for the rest of his life.

    The takeaway from this event was a culminating experience of 4 years of CrossFit Games Teen championships and getting to workout with his best friends. Many people enjoy the sport of CrossFit, but what keeps most of us coming back is the community.

    Just like in your local box, sweating together through fitness and community builds bonds that will remain for a lifetime.

    Moving forward to the 2021 season, don’t expect Tudor to sit back and take some time off.  He feels confident moving up into the Open division and showcasing what he can do against some of the best in the profession.

    Follow Tudor on Instagram @tcmag_cf and his coach Matt Torres @coachmatttorres to see how he and the competition grows in the coming months and years.

    Hone in on your own individual weaknesses with the support of one of our expert 1-to-1 coaches. They’ve taken multiple athletes to the CrossFit Games and can guide you towards your goals with tailored training specific to you

    Click here to apply for a free consult today.

  • Yoga for the Athlete

    Misconceptions of Yoga

    Here’s the thing. Stereotypical misconceptions of yoga still exist – I base this on what I hear in podcasts, conversations with friends, and certainly by some strength and conditioning coaches, many of whom I respect.

    To a degree, I can’t blame them – a lot of what we see on Instagram is pretty pictures of freakishly bendy women and it’s like we physically cringe in pain at the thought of attempting to contort ourselves in the same way. We associate extreme, almost unnecessary flexibility with yoga.

    How is THAT meant to help with fitness!?

    Back to the Source

    Yoga stems from the ‘Vedas’ – Indian holy texts that date back to 5000 years ago. From these also stemmed the religions Hinduism AND Buddism.

    Yoga became a philosophy – a way of life – and ancient texts talk in detail about many of the concepts we discuss as athletes today.

    Take ‘enjoying the process’ for example – this can be likened to one of the morals for daily life in yoga, ‘Aparigraha’, defined as ‘non-attachment’.

    We talk about letting go of attachment to outcomes all the time in training – instead, focusing on putting the work into our daily habits.

    Yogic philosophy is a massive part of ‘yoga’ – it essentially sets a foundation to enable the student to acquire tools to be a decent human, something we all strive for in our daily life.

    The ‘Asana’ (physical practice) side of yoga is what we all commonly know yoga to be – and whilst bendy poses seem to be everywhere, it’s far from what yoga is actually about.

    WHY Yoga and More Specifically, Why ‘Yoga for the Athlete’?

    ‘Asana’ literally means ‘steady pose’ – like training, if you become efficient at a set of movements, you can move more quickly through them; and if mastering ‘bendy’ postures is a goal then like anything, that’s certainly something you can work towards.

    But that isn’t the point of yoga. Yoga practice is meant to create space in the body, through the practice of aligning movement and breath.

    I created ‘Yoga for the Athlete’ because I am both a yogi and an athlete.

    I saw an obvious gap and wanted to combine the stillness created by a mindfulness practice with yoga-inspired sequences to open up the body.

    Still unsure what it’s about? Give it a go!

    Follow along with the 20-minute session below – try it on a rest day or after a training session and let us know how you get on!

    Follow @yogafortheathlete on Instagram for more wellness tips and mindfulness practice to enhance your training.

    If you’re ready to commit to working on your mental game before the ‘21 competition season, check out our Mental Performance E-Book Course, Feed The Athlete led by Brute Mind Coach, Lauren Tait.

    This course is designed to transform negative self-talk into absolute confidence in your abilities as an athlete.

  • 4 Core Exercises For Stronger Olympic Lifts

    Unbelievable Abs?

    In Olympic weightlifting, the core is always used in more of an isometric and stabilizing manner. The abs are never actually in flexion as if performing crunches or sit-ups.

    In this regard, doing crunches and sit-ups will have almost no carry over to the Olympic lifts. Instead, core work for Olympic lifters should be performed as isometric holds or where other parts of the body are moving while the core is stabilized.

    Examples of great exercises that will transfer over to Olympic lifting are planks, isometric positional holds with a barbell, Hyperextension holds on a GHD machine and weighted leg extensions.

    1. Planks

    While doing planks, the athlete should keep their core tight and not allow their abs to sink into the ground. Ideally, this should be held for 30 seconds to around 2 minutes.

    2. Barbell Isometric Holds

    For isometric positional holds, the weight should be around 85-95% of the athlete’s best clean or snatch and the position should be held around 10 seconds.

    3. GHD Hyper Extension Holds

    Hyperextension holds on a GHD machine should be done around 15-30 seconds and depending on the strength of the athlete, a barbell may or may not be used.

    4. Weighted Leg Extensions

    For weighted leg extensions, a plate should be put on the shins while the athlete extends the legs out and then brings them back to the body.

    Make sure to keep the small of the back flat against the ground and the feet do not return to the ground while performing this exercise. The rep scheme should be 10-15 reps of this.


    If your strength numbers just aren’t quite up to par with your competitors, don’t sweat it. We’ve got a secret weapon for you. A Secret Strength Weapon, as a matter of fact.

    We’re throwing you a bone and offering you the gift of gainz. This is a FREE accessory training guide that can be easily implemented into any CrossFit program. It’ll close the gap on your weaknesses and help you pack on some serious size and strength in the off-season.

    In this free training guide, you’ll receive 32 additional training pieces from warm-ups to arm workouts all with one goal in mind. Getting you strong like bull.

    Click HERE to pick up your FREE Secret Strength Weapon.

  • The Real Hatch Squat Cycle

    [yikes-mailchimp form=”17″]

    For the last 20 years, the “Hatch Squat Cycle” has become synonymous with being one of the go-to programmed squat cycles that are known to be both brutal and successful for building leg strength.  

    As a 17 year athlete of the legendary Gayle Hatch, I am here to finally set the record straight. This squat cycle is NOT even close to anything I have ever done in my career and is in no way, shape, or form a reflection of the true Hatch Squat program. 

    Let’s first begin by describing who Coach Hatch is, and then we will delve into the true genius and masterminding of his squat program.  

    Gayle Hatch’s contributions to Olympic-style weightlifting and strength training are quite considerable. Among Hatch’s many accomplishments are memberships in the USA Weightlifting and USA Strength and Conditioning Coaches Halls of Fame. He served as Head Coach of the men’s 2004 USA Olympic Weightlifting Team that competed in Athens, Greece.  

    Hatch’s club, the Gayle Hatch Weightlifting Team, has a tradition-rich program that has won 54 USA Men’s Olympic Weightlifting National Championships. Coach Hatch has also had athletes make three United States Olympic Teams and 12 World Teams. He has had more than 50 athletes selected to other U.S. international teams. 

    Coach Hatch’s athletes were renowned for their leg strength during his dominant years in the ’80s, ’90s, and ’00s.  So much so that coaches worldwide would continuously approach Coach Hatch, asking him for the secrets behind his squat program.  

    In the early 2000’s Coach Mike Burgener approached Coach Hatch looking for an example of his squat cycle he used with his athletes.  At that time, Coach Hatch sent him this template, which consisted of reps ranging from 10 reps to 1 rep and squatting twice per week with both front squats and back squats performed on the same day.

    The only similarity of this program to the true Hatch Squat program is that yes, we did perform back squats and front squats twice per week, and we also performed both back squats and front squats on the same day.  

    That is where the similarities end.  

    The volume and intensity were completely different and actually more simple than most would believe.  He sent this “squat program” to Coach Mike Burgener because he was very protective of his training philosophy and did not want his “secrets” floating around. That’s why he would continuously hand out templates like these and parade them as his own.  

    The true Hatch Squat Program consisted of us squatting on Tuesdays and Thursdays, and our High CNS days (aka Olympic lifts) were performed on Monday, Wednesdays, and Fridays.

    These Tuesdays and Thursdays were known as our “Squat days” and would take us about an hour each day just to perform the squat portion of the lift.  After the squat was finished, we would proceed to other absolute strength exercises such as military press, push press, bench press, incline press, dips, curls, pull-ups, abs, and hyperextensions.

    The beauty behind the squat program was its simplicity in nature and repetitiveness of it.  Coach Hatch never believed in squatting over 8 reps and would only program 8 reps once or twice per year, and these days were called “Bucket 8’s,” and they still haunt me to this day.

    Coach Hatch also never allowed for any sets to be less than 3 reps.  He felt one rep or two rep max in the squat was not enough juice for the squeeze.  Therefore, the only reps we ever performed, outside of “Bucket 8” days (that’s a whole other blog in itself), were triples and sets of 5. 

    Right, it seems so simple.  We also never performed sets of 4—only sets of triples and 5’s.  Whatever squat you were to perform first that day was to be your triple max.  After finishing triples on that lift, we would proceed to sets of 5 for the other squat lift.

    We would go to the maximum every time we tripled on the squat, and the goal was to attempt a PR every week unless it was a deload week.

    Here is the general breakdown of our template:

    Week 1:

    Day 1:

    Front Squat: work up to a max triple.  Sets of 3 all the way up.  Your last sets should be: 70%, 80%, 85%, 90%, 95%, attempt new PR

    Immediately following front squats, you would move to back squats.

    Back Squat: 4×5  Whatever you worked up to on Front Squats, you would take 4 sets working back up to that weight, and the jumps would be done in 5% increments.

    For example, let’s say you hit a new PR on your front squat triple that day, giving you a new 100%.  Your back squat would be these 4 sets of five at 85%, 90%, 95%, and 100% of that new front squat triple weight.


    Day 2:

    Tempo Back Squats (5 seconds eccentric lower) tripling up to 80% of your 3 rep max Back Squat with 4 sets above 70% of the prescribed weight for the day.

    Immediately following back squats, you would move to front squats.

    Pause Front Squat (3-second pause at the bottom position) tripling up to 80% of your 3 rep max Front Squat with 4 sets above 70% of the prescribed weight for the day


    Week 2:

    Day 1:

    Back Squat: work up to a max triple.  Sets of the all the way up.  Your last sets should be: 70%, 80%, 85%, 90%, 95%, attempt new PR

    Immediately following back squats, you would move to front squats.

    Front Squat: 4×5  Whatever you worked up to on Back Squats, you would take 4 sets working back up to 80% of that weight, and the jumps would be done in 5% increments.

    For example, let’s say you hit a new PR on your Back squat triple that day, giving you a new 100%.  You would then take 80% of this lift, and that would be the final weight you would hit on front squats.  Your front squat would be these 4 sets of five at 85%, 90%, 95%, and 100% of that prescribed weight.


    Day 2:

    Tempo Front Squats (5 seconds eccentric lower) tripling up to 80% of your 3 rep max Front Squat with 4 sets above 70% of the prescribed weight for the day

    Immediately following front squats, you would move to back squats.

    Pause Back Squat (3-second pause at the bottom position) tripling up to 80% of your 3 rep max Back Squat with 4 sets above 70% of the prescribed weight for the day


    Week 3: Deload week

    Front Squat: triple up to 70% of your max triple. Sets of 3 all the way up.

    Immediately following front squats, you would move to back squats.

    Back Squat: triple up to 70% of your max triple. Sets of 3 all the way up.

    This would be the normal template we would follow year after year, and it never really varied.  The only variance would be every so often when we were in a deep cycle, and our CNS was holding up strong, we would add in another loaded week before the deload week, therefore, making a 4-week cycle instead of a 3-week cycle.  The four-week cycle would look like this:

    • Week 1: Perform a normal week 1 squat workout
    • Week 2: Perform a normal week 2 squat workout
    • Week 3: Perform a normal week 1 squat workout
    • Week 4: Perform a normal week 4 squat workout

    Let it be known that we did squat every day as on the non “Squat Days,” we would perform exercises like squat cleans, squat snatches, Bulgarian split squats, step-ups, etc.

    Also, as years would pass on this current “squat system,” the second day programmed each week was replaced by a light squat day, and then eventually, we only had one “squat day” per week.

    Now I can imagine you being upset and wishing this long drawn out yearly cycle included many ups and downs in volume and a ton of variance.  His squat program’s real secret was that most of his athletes began training under him in their early teens on this exact squat program.

    Over the years, they built a huge tolerance to squatting and built an incredible “base” strength to carry over to the Olympic lifts.  Imagine if you started squatting in this manner at the age of 13 and continued in this same pattern for over 7 years.  Your legs would be tremendously stronger.

    With that being said, this program will still work no matter what age you are and current training status, but also understand that it will take a few weeks to get used to this volume. 

    If you’re looking to try the “Real Hatch Squat Cycle” out for yourself, you’re in luck. We’ve created an excel template that will allow you to put in your max triple front squat and max triple back squat and calculate the numbers for you each week.

    Each time you record a new triple record on either the back squat or front squat, simply just change those numbers in the template, and the corresponding numbers will change through the program within the weeks.

    [yikes-mailchimp form=”17″]

  • Another day at the grind…

    In episode 2, I get into some sauna thoughts – Why being flexible with your schedule will serve you better than a rigid daily routine.

    I also dive into some good ole fashion training from the Brute Games Prep program.

    With a busy day on the books, I share some of my strategies to fit an entire day of training into one session while the kids are down for a nap.

    Is it optimal? No… Did I get fitter? You bet.

    Kicked it off with some easy Aerobic work, followed by some strength training. All of the squats and pressing were on the menu for the day’s session, and I share one of my strategies for getting stronger while saving time.

    Wrapped it up with an AOT(Advanced Operator Training) Gymnastics Intervals and called it a day. Give this piece a shot if you’re looking for a short sweet anaerobic piece.


    3 Rounds for time

    3 Bar Muscle-Ups

    10 Russian KBS 70/53 lbs.

    3 Bar Muscle-Ups


    Want to train alongside me and the rest of our community? Try our Brute Compete programming FREE for 7 days.