Uncategorized

  • Assistance Work for the Jerk

    Considering how to best improve your clean and jerk is truly analogous to the saying, “a chain is only as strong as its weakest link.” While there are perhaps a couple dozen reasons to miss a clean & jerk, it comes down to failure in one of three parts: the rack (failure to shoulder the bar), the squat (failure to recover from the bottom position), or the jerk (failure to secure the barbell overhead). A random review of 81 missed C&Js across six weight classes from last year’s world weightlifting championships revealed that 60% of the missed C&Js were missed in the jerk portion, while 32% were missed due to failure to rack the bar, and only 8% failed because the lifter was unable to stand with the weight. Of course, statistics can be misleading. For example, a jerk could be missed because the lifter’s legs are deficient and, while able to get out of the bottom position and stand, after a grinding clean, there was nothing left for the jerk. Or, perhaps the lifter is simply tired or following himself. Regardless, most with experience in weightlifting would agree that more jerks are missed than the other two possibilities combined.

    I don’t know which would be more frustrating: making easy cleans and missing jerks, or having a big jerk – being able to stand with anything you can shoulder, and jerk anything that you can clean, but always missing the heavy cleans in the rack and never getting to display your jerks, except when working off a squat rack. While it may not be as much fun, common sense dictates that training should be focused on your weaknesses. Many lifters fail to do that; instead they emphasize what they are good at. It’s human nature to enjoy something we excel in doing.
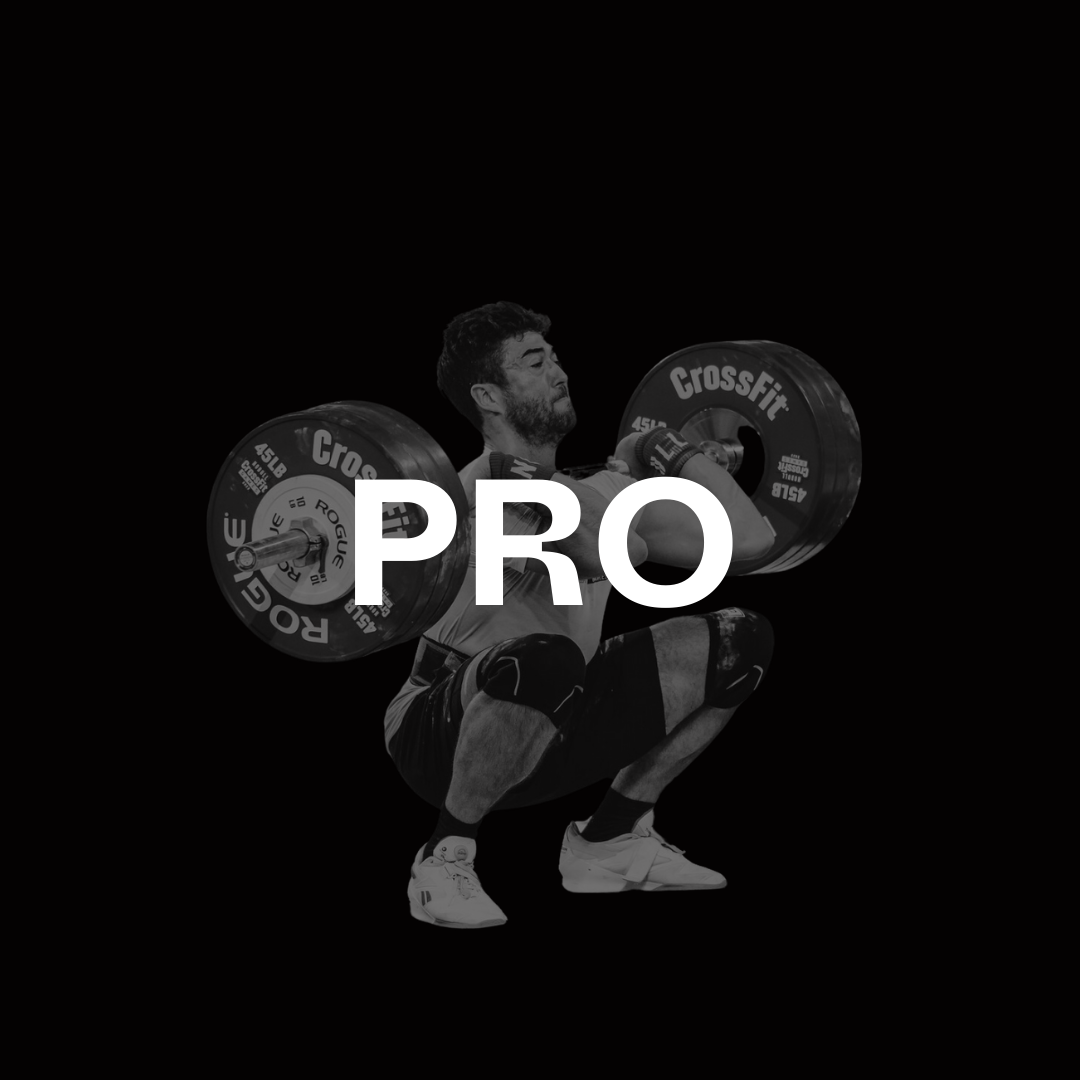
    Improving Your Jerk

    While one of the United States’ greatest lifters once said, “if you want to improve your jerk, do jerks,” it may not always be that simple. Assume there are no glaring technique errors and the issue at hand is relative to strength. Think about your missed jerks, those that are missed simply because they are too heavy. What part is heavy? Does the bar feel heavy on your chest after the clean? What about the dip? Does it seem difficult to reverse the dip and accelerate the drive off the chest? How about the split position? Does the weight feel heavy overhead, or does it not even reach lockout? Does recovery from the split seem difficult and once accomplished, do you have a difficult time supporting the weight overhead, losing the bar if it is even slightly out of position? There are specific remedies for all of the above.

    If the weight feels heavy on your chest or in the dip and drive portion, consider jerk drives or quarter front squats. These are overload movements and, while it is not mandatory, best performed on jerk boxes. If doing jerk drives, use the exact movement you would in the actual jerk and dip no lower, or higher. Use weights that are around 110% of your jerk. You want a reasonable amount of speed, and you do not want to break positions. Keep the reps low, no more than three. For the quarter squats, you may go up to 125%. Both exercises should help your support strength with the bar shouldered.

    Believe it or not, another exercise to consider is the bench press. Most weightlifters do not bench press, but some have found that it has helped both the jerk and overhead strength in the snatch. The added upper chest and shoulder strength provides a better “platform” from which to jerk. Incline presses are another option.

    Weightlifters are strongest in the legs, hips, lower and upper back, proportionately less so in the arms, chest and shoulders. If you find it easy to drive the barbell off your chest, but lack arm strength to get it to the finished lock out position, or keep it there, there are many options available which should help. Probably the first one to try is the classic push press. In this exercise, you use your legs to drive the bar off your chest but once extended, your legs remain locked and you use the shoulders and arms to finish the lift, usually pressing the weight out from around the top of the forehead. This exercise also requires a precise dip and drive, as any bar out of the groove is unsalvageable as the feet do not move before or after. Regular presses are fine, but you will not be able to use enough weight to challenge yourself at the finish portion of the movement, as the most difficult piece of that lift is getting the bar off your chest. With the push press, you use the legs, just like in the jerk, and can therefore use a heavier weight to work the top part of the lift, as well as work on your dip and drive.

    Another popular exercise is the push jerk, or power jerk, which is the same as the push press, except the legs re-bend into a partial squat, without splitting the feet forward or rearward. This exercise will allow the use of more weight and force you to “push” yourself under the bar. Bar placement is important as well, as you will not be able to adjust to a forward or backward barbell since the legs are not in the split position.

    Work from the recovery position is indicated if you routinely get the weights locked out, but lose them prior to getting your feet in line. Two exercises come to mind immediately. First, jerk recoveries, which are done in a power rack. Position the pins at the height the bar would be in the split jerk position. Take the split position under the bar with your arms locked out and using your legs from the split, lift the bar off the pins, then recover with the feet together in the finish position. Heavy weights may be utilized. Another good exercise is holding the bar in the split jerk position, overhead, for an extended period. This can be part of a regular C&J and the split position can be held for five to ten seconds and weights in the 80-90% range can be used. While positions and balance will be stressed, caution should be used as this exercise is taxing on the shoulders. Don’t do this on a heavy jerk day.

    If you find the weight always feels heavy overhead, lockouts can be used to increase support strength. Another power rack exercise, similar to the jerk recoveries, position the weight on the pins just at the top of the head and simply press it to lock out from there. Overhead supports are another option. This is an overload exercise also done in a power rack. Place the pins so the barbell is about three to four inches from the overhead height. Get under it with locked arms and bent legs. Keeping the arms locked, push the bar off the pins by extending the legs and hold the weight overhead for several seconds. Some lifters have used as much as 120% of their jerk. It is also hard on the shoulders, but any 100% weight that gets overhead in a competition will stay locked out.

    Dependent on what your jerk weakness may be, there should be something here that will help improve upon it, perhaps even making the jerk the easiest part of the lift.

  • Know Your “Why”

    I sat in a cheap motel room in Salt Lake City with my friend Dan. It was June of 2009. I’d been up for a few days smoking crack and shooting heroin. I had isolated myself from my friends and family, and abandoned the support system I had used in recovery. I had lied to my therapists, my AA sponsor, everyone. In spite of my best efforts, I had once again let myself slip into a dangerously depressive state. The shame was a sharp edge, cutting unbearably deeper every day. I figured if I did enough drugs I could forget about it momentarily, or at least dull the pain.

    Fast forward two years later, and I’m standing atop the Crossfit Games podium with my teammates from Hack’s Pack Ute. I was happy, and free of any desire to use drugs anymore. How did I make such a dramatic turnaround? Through purpose. Not the kind you lose and rediscover, but the kind you invent. Since my relapse nearly six years ago, I’ve experienced emotional highs and lows like anybody else, but I’ve never returned to that same level of depression and self-loathing. I’m not writing this article to tell you how I stopped hating myself. Rather, I’m writing to tell you how, through a mindful practice of compassion and gratitude, I overcame my addiction, reclaimed my life, and achieved a level of happiness I had never thought possible.

    Salt Lake City, 2009

    2008 and 2009 were busy years for me. On top of finishing 12 months of inpatient rehab, I also ran the Salt Lake City Marathon (winning my age division), and got nearly straight-A’s in the Honors Program in my first semester of college. I had exceeded every marker of what I considered “success,” yet I had never been more miserable. After leaving inpatient treatment, I was convinced I knew exactly what I needed to do in order to stay clean: work hard, be honest, and help others. I still live with these basic principles in mind, and while they briefly kept me on track after rehab, I didn’t then, as I do now, have a clear understanding as to why, other than the fact that these principles helped align my actions to be more consistent with them. But soon my moral instrumentation began to fail me, and with no tangible purpose guiding my purported principles, I gradually began to veer off course, focusing more on being cool, having sex, and convincing everyone around me of my own self-importance. Any sense of humility all but disappeared. My brain was in turmoil, wrangling with my blatant hypocrisy. I was regularly doing things that didn’t align with my core principles, and the depression and anxiety that had fueled my drug addiction returned. Rather than fight to find my way back to the clean path I had set, I wandered back into darkness, to drug use, and relapse, eventually hiding away in a cheap motel desperately trying to numb myself against the realities of the world outside.

    I had a long road to walk after I got clean. My relapse administered a much needed dose of humility, which I credit with saving my life. Practicing that humility though rigorous honesty and service to others became a huge part of my life. In fact, it became the most important thing in my life. From mentoring other people in recovery, to housing recovering addicts (sometimes for months on end), I was dedicated to doing whatever it took to stay free of my addiction. In Daniel Pink’s book “Drive”, the author cites a sense of purpose as one of the three most important aspects of human motivation. I felt like my purpose in life was to help others. My service filled me with gratitude, and a newfound sense of fulfillment. Service became my why, my purpose, around which everything in my life revolved. I began studying psychology with the goal of becoming a social worker. I believed (falsely) that every action I took was completely selfless. Truthfully, I was then, and am now, a more selfish person than I aspire to be. But, after my relapse, I was more aware of my mistakes, and willing to hold myself accountable for them. My sense of purpose had repaired my moral instrumentation, but I still wasn’t completely certain about my direction. I was still missing a key ingredient, the pursuit of mastery, necessary to motivate the profound changes I wanted to make in my life.

    Until I found Crossfit, the only thing I had really been passionate about since getting sober was not losing (which is entirely different than winning). The fact that when I started Crossfit I was smoking a pack of cigarettes a day, had lost a ton of strength during rehab and marathon training, and was consequently finishing last in daily workouts, was enough motivation for me to stick around. Service was my purpose, and Crossfit reignited my passion and desire for mastery, but I didn’t know how to tie those things together—until I started coaching.

    As much as I had learned about the workings of the mind as a psychology major, I knew very little about the mechanics of the body, in spite of the fact that I had played five sports in high school. Through Crossfit I became enthralled by the capabilities of the human body. After realizing I lacked the emotional fortitude to be a social worker, I spent the next couple years contemplating going to medical or physical therapy school. Those seemed like the safest routes to take.

    My plans were still congruent with my why, my stated purpose of a life spent in service to others, but my actions, same as before, started to run counter to that purpose. I didn’t relapse, but my focus once again turned inward, my desire to serve others devolved to a desire to serve myself, and competitive Crossfit became the all-consuming focus in my life.

    I wasn’t miserable during this time. I wasn’t even particularly unhappy, per se. But my competitive success didn’t bring the same sense of fulfillment I had felt years prior when I was first drawn to social work. If my dad has taught me anything (other than how to get a rise out of someone), it’s the importance of creating balance in life. As an addict, that’s a tough line to walk, because most everything in my life has been firmly black or white; everything, or nothing at all. I reintroduced meditation into my life, and put more emphasis on my relationships with my friends and family. Learning to live a life driven by purpose doesn’t happen all at once. Sure, I’ve had some revelatory moments in my life, but where I am today is largely the sum of the smaller, conscious decisions I’ve made.

    Salt Lake City, 2012

    After college the plan was to apply for physical therapy school. It seemed like something that would fulfill me. However, the end goal of being a physical therapist didn’t really excite me. It didn’t seem like the “full package” I was looking for. Around that time I was offered a job at Southern Utah University as a strength and conditioning coach. I had honestly never even considered it, but when it was mentioned I was immediately interested. Being a strength and conditioning coach had the excitement factor I was looking for. I saw it as a way to get paid to do something both exciting and fascinating to me.

    I took the job and entered a Masters program in Sports Performance and Conditioning. The practical experience alone was priceless. I had the opportunity to work with several D1 programs, some of which I was entirely in charge of in terms of strength and conditioning. The best thing that happened to me at SUU was meeting the assistant strength and conditioning coach, Jake Hutton. He was and still is the best sports performance expert I’ve met. He instantly became a mentor to me. My narrow view of strength and conditioning rapidly expanded. It went from a passion to nearly an obsession. I spent hours on end reading books and scouring through articles online, and I think I subscribed to about 10 different sports performance websites within a month.

    The choices I make, good and bad, reflect a choice to behave either in accordance with, or contrary to, my purpose. When I act contrary to my purpose, it’s more often than not reflective of a desire to immediately satisfy some need. I’ve had to repeatedly learn to resist what I want now to get what I want most.

    The desire for instant gratification is powerful at times, overwhelming at others. In 2012 I attended a SealFit Kokoro Camp with my Hack’s Pack teammates, and was confronted with a choice: endure the pain in my back and feet for the sake of my teammates (who were hurting just as much), or quit, and put an immediate end to my physical discomfort. Regrettably, I chose the latter, and committed one of the most egregious offenses against my “why” to date. It was the worst I had felt since my relapse. I was embarrassed and my ego was bruised, but more than that, I had violated my family credo: no quitting. No matter how tough, no matter how much you may not want to, provided there’s no risk of serious, long-term injury, there’s no excuse for quitting. So I signed up for another Kokoro Camp, and completed it a week after the 2013 Crossfit Games.

    The day after Kokoro I began the opportunity of a lifetime, which is to work with the LSU strength and conditioning staff under the renowned coach Tommy Moffit. The practical experience alone of working with world class athletes was priceless. I also gained an enormous amount of valuable knowledge on everything from speed and agility, to hypertrophy methods, to mental toughness, etc.

    At the end of 2013, I underwent a long needed lumbar fusion surgery. I was born with a condition called Sponylolisthesis, and football, powerlifting, and Crossfit compounded with that pre-existing condition to produce neurological damage. To say that I was humbled would be an understatement. I had never felt physically incapable in my entire life. Sure Kokoro was painful, but in a different mindset I would have been fine. After this surgery, I couldn’t walk for more than 400 yards for the better part of a month. I was absolutely crushed. However, as always, this challenge ignited another huge positive shift in my mind. I had always identified myself as an athlete and put a disproportionate amount of my self-worth on my athletic success. The recovery period from surgery gave me a lot of time to consider getting back into Crossfit and ultimately to accept the fact that I may never be a competitive athlete again.

    So I made another move. Working at LSU was extremely exciting, but I wanted more autonomy. Call it cockiness or just human nature; I wanted to create my own thing. I had an offer from my old teammate, Tommy Hack, to buy one of his gyms in Salt Lake City with Jake Hutton. Owning a gym had never appealed to me, but the prospect of working with my good friend and mentor again attracted me. During the past year I had also been training a number of Crossfit athletes online with another one of my best friends, Matt Bruce. When I decided I was going to move, Matt, Tommy and I started our new company, brUTE Strength, with an entirely new vision.

    First off, I saw the opportunity to do something entirely different from any other Crossfit Training program. I observed that several of the most successful coaches were one-man shows. I wanted to create a team of coaches, like most other professional sports, that would work together for our athletes and clients.

    Just as with our Crossfit programs, I wanted to create the absolute highest quality training programs for average joes, whether in or out of Crossfit gyms. To be completely honest, this was the most attractive part about starting this company. It helped me align my sense of “purpose” with something exciting and fun.

    When your decision-making is based on your “why,” your purpose, you naturally gravitate to the people and vocations that are most likely to provide you with long-term happiness. You don’t have to know exactly what you want to do (I didn’t for the longest time); it’s about values. Try different things, but make sure whatever you’re doing is in line with those values. Also, remember that you are human, and you will make mistakes. It’s an inescapable part of the learning process, but those mistakes, as painful as they can be at times, are opportunities to grow. Don’t let the pain from failure, or the fear of failure itself, deter you from pursuing what you are most passionate about. In moments of self-doubt, remind yourself why, and how will become clearer.

    I doubt myself every single day. I get scared on camera. I often eat poorly and fail to make my bed. I make selfish decisions. I can be lazy as hell. The thought “I’m a fraud” and “I’ll never amount to anything” constantly try to pull me in. Despite all of these things, I choose to act in a way that aligns with my “why.” I do things I’m afraid to do every single day. I get shut down, and I try again or just find a different angle.

    I hope this helps some of you, even just one of you, to find a little hope, inspiration, or just perspective.

  • Maybe you’ve heard something along the lines of, “bodybuilders try to look good, while weightlifters try to do good.” Perhaps you’ve heard weightlifters refer to the powerlifts as “half lifts.” Meanwhile, the power lifters refer to the Olympic lifts as the “trick lifts.” Have you heard the snatch referred to as “gymnastics with a barbell”?

    Gymnastics with a barbell may not be too far of a reach. Gymnasts are known for their extreme flexibility along with their speed and quickness, which are all necessary elements of the snatch and the clean and jerk. Poor flexibility will seriously limit one’s ability to succeed in the lifts. Worse, flexibility deficits may prevent the trainee from even being able to make a reasonable attempt to learn how to perform what are very skilled and technical movements.

    Of the critical elements necessary to succeed in the snatch and the clean and jerk, skill and technique are at the top of the list. Of course, strength is important, too, but at some point, if one lacks speed and the ability to hit certain positions, it does not really matter how strong the lifter is. Think of it in these terms; assume you are a novice lifter starting out from scratch. Which asset would you rather have, from day one: strength or technique? Most would say technique. Once the technique is mastered, you always have the potential to add strength, to get stronger. However, if you have technique limitations, if you cannot put your body in the correct positions, it really does not matter how strong you are.

    Watch any weightlifting competition, from a local junior meet on up to the world championships. How many times do you see an opener missed, or second attempt missed, and the lifter comes back and gets it on the next attempt? That is not uncommon at all. So, what happened? They missed the opener, they got stronger in the next four minutes and made weight same weight on the second? I don’t think so. In fact, it is not rare for a lifter to increase the weight after a miss, in order to get a little extra rest between the attempts, or simply to stay with the competition. Obviously, the weight was missed due to a technical problem. If you think about it, there is really only one acceptable reason to miss a lift, and that is because it is too heavy. If you are strong enough, you should complete the lift.

    While there are many aspects of “technique” for weightlifting, it could be argued that speed, flexibility and balance are most important – with flexibility being the most important of the three. Look at it like this: in each element, the snatch, the clean and the jerk, the bar is raised overhead or to the shoulders, while the body is lowered, at the same time, below the bar. For example, a successful snatch will require the bar to achieve a specific height, at a speed which will allow time to get below the bar and secure it overhead. Simple logic dictates that the lift would be easier to complete if the bar did not need to be as high. More weight can be used in the dead lift than the clean because for the most part, the weight does not need to be elevated as high. More weight can be lifted in a full squat clean than a power clean simply because you squat lower doing a full clean.

    In executing the snatch, more weight could be lifted if the lifter could achieve a lower bottom position, because less bar height would be required to successfully get under the bar. Likewise, a wider grip will lower the bar overhead, meaning less bar height will be necessary to achieve a locked out position. Putting a bar overhead with a jerk grip will require more height on the bar than putting it overhead with the wider snatch grip.

    In terms of flexibility, to maximize success in the snatch and clean and jerk, ankle, hip and shoulder flexibility are most important. In the squat position, limited ankle flexibility will limit the depth of the squat and have a negative impact on balance. Poor hip flexibility will also limit depth in the squat and as well as make it difficult, even impossible, to support the weight on the shoulders or overhead. Poor flexibility of the shoulder girdle will make it difficult to balance and support weights overhead due to the bar being positioned too far forward, placing it out of line with the torso. In the squat clean position, poor shoulder flexibility will make the rack position more difficult.

    Improve Flexibility and Maximize Success

    Let’s address ankle flexibility first. In the low squat, your knees should be in front of your toes, or, in other words, your leg should be at an approximate 45 degree angle with the platform. This will naturally bring your hips forward, directly under the bar.

    I know, I know, in the squat, the knees should not go forward and the leg should be perpendicular. That is a topic for another discussion, but for our purposes, think about what that position will do with your hips. They will be moved back, behind the ankles and the bar, making any reasonable depth impossible as the lifter will fall over backwards.

    Any exercise or stretch that puts the ankle/foot into flexion will suffice, but arguably the best way to train flexibility is to assume the required position and hold it for a sustained count. Some will, while sitting in the bottom position, place an empty bar across the thighs. This pushes the knees further forward, while stretching the calves and Achilles. Another simple ankle stretch is done standing, facing a wall. One foot is forward while the other is back, similar to a split in the jerk. Both hands are on the wall. The back foot remains flat on the floor while the knee is forced forward towards the wall. You should feel a stretch over the back of the leg.

    As important as ankle flexibility is to a proper bottom position, hip flexibility is even more important. In fact, those with poor bottom positions often assume it is due to poor ankle flexibility when it is the hips that are the problem. The ideal position, in the squat, is the hips between the ankles.

    If you were to look at a lifter, from the side, in the bottom of the snatch, you should be able to draw a straight line, perpendicular to the platform, through the ankle, hips, shoulder and bar. In reality, few lifters can get into this position. Typically, the hips will be slightly to the rear of the ankles, while the shoulders are slightly forward due to the forward lean required to compensate for the rearward hips, and the bar will be behind the shoulders so everything is in balance—ankles forward, hips back, shoulders forward, bar back. Of course, if the bar is not back far enough, it will be lost forward due to the forward lean of the torso. Conversely, if the bar is too far back, excessive stress is placed on the shoulders and it will drift behind. Add to the equation a bar that is pulled out of position and things get more complicated and precarious.

    There are a couple of simple exercises to help reinforce an upright squat position. This first one can be used with either front or back squats. Take a broomstick and have a coach or training partner stand behind you. With the broomstick straight up at 90 degrees, your coach stands behind you and places it anywhere from six inches to a foot (or more) behind you. As you squat, you focus on keeping the hips from touching the broomstick. To do so, you will need to keep your chest up and push your knees forward, which will bring the hips forward, where they will be closer to actually getting between the ankles, directly under the shoulders and not behind them. As you improve, the broomstick can be moved closer to you.

    Another common exercise is the freehand squat while standing with the back to the wall. If you stand against a wall, heels, hips, and shoulders touching the wall, and attempt to squat you will likely find it impossible to get below a half squat. Move the feet away from the wall, you’ll get a little lower. The intent is to be able to get into the bottom squat with the feet as close to the wall as possible.

    Tight shoulders will prohibit a solid rack position in the clean and make it more difficult to fix the bar directly overhead. In the snatch, the bar, when overhead, should be about six to eight inches from the top of your head. A wider grip would bring the bar closer to the head, essentially lowering the bar. A wider grip makes it easier to adjust for weights out of the groove or accommodate for less than perfect squat or jerk positions. On the other side, a wider grip lends towards instability and places increased stress on the shoulders. You have to find the “happy median,” whatever works best for you. As most lifters squat with the hips slightly rearward, the bar needs to be back behind the head in the overhead position in the snatch. Decreased shoulder flexibility negatively impacts the ability to do that.

    One of the simplest, easiest and best exercises is the shoulder dislocate. Done with a broomstick or PVC pipe, take a wide grip and move the bar from overhead to behind your back, keeping your arms extended throughout. Gradually, move the grip in and repeat until you cannot complete the movement while keeping the arms locked. Using an empty bar, taking a clean grip and doing an overhead squat is a great exercise for shoulder flexibility. Doing snatches with a clean grip is another one. The “Sots” press will help balance and positions, as well as flexibility. This is an exercise made famous by a Russian weightlifter, Victor Sots. It is a press done from the bottom squat clean position. Obviously, light weights are used, though Sots was known to do these with up to 160 kilos. Success will require perfect upright positions, balance, and ankle, hip and shoulder flexibility.

    Even a slight increase in flexibility can add five to ten kilos to your lifts and it just takes some thought and fifteen minutes of work each workout. Better yet, spend a few minutes each day, even twice a day and see increased benefits.

  • Tips for Crossfit Open Workout 15.5

    Watch this video to hear our tips for Crossfit Open workout 15.5

  • Tips for Crossfit Open Workout 15.4

    Watch this video to hear our tips for Crossfit Open workout 15.4

  • “Get as strong as possible. If you can’t get strong, at least get really, really big so that when you lay that weak ass punch on your next assaulter’s eye socket, there is some weight behind it.” – Elder Hacksaw

    When Tommy Hackenbruck was a boy, he got in a lot of fights. A lot. Between the pencil-thin calves and his intensely prominent jawline, he probably got into a fight every other day. That’s when his father brought him a gift. A gift so sought after by men that they will risk and willingly sacrifice the size of their testicles and depth of their voice to obtain. A gift so special that numerous sports have been entirely dedicated to it. His father gave him the gift of strength. He specifically gave him this 5-week squat cycle with these parting words: “Son I promise you, you will PR your squat if you complete this 5-week cycle. I mean, assuming you don’t totally crack out on ‘WODs’ and jogging.”

    Click each day for a link to the corresponding brUTE video. And don’t forget to tag @brute.strength on Facebook or Instagram!

    *Supersets are denoted as such: 2a, 2b. Trisets are denoted as such: 2a, 2b, 2c. You do one set of a, then a set of b, then a set of c. Rest. Then repeat for the rest of the sets.

    WEEK 1

    MONDAY

    1. 5×4 Clean Shrug Pull @ 80%, 85%, 90%, 95%, 95% of clean 1RM
    2. 4×6 Front Squat – 1 ¼ @ 60%, 65%, 70%, 70% (4 count lower ¼ up / all the way up)
    3. a. 3×6 Reverse Lunge @ 40% Back Squat 1RM * (Each leg)
      b. 3×6 Romanian Deadlift @ 55% of regular DL
      c. 3×6 – GHR AHAP
    THURSDAY

    1. 5×3 Hang Snatch @ 70% (use straps)
    2. a. 5×3 Speed Squat (Pause @ bottom and explode up)
      b. 5×4 Snatch Grip Vertical Jump
    3. a. 5×3 Speed Reverse Lunge (Each leg)
      b. 5×4 Cycle Jumps

    WEEK 2

    MONDAY

    1. 5×3 Clean Pull @ 85%, 90%, 95%, 100%, 100% of clean 1RM
    2. 4×6 Front Squat @ 65%, 70%, 75%, 75% (4 count lower)
    3. a. 3×6 Reverse Lunge @ 45% Back Squat 1RM (Each leg)
      b. 3×6 Romanian Deadlift @ 60% of regular DL
      c. 3×6 – GHR AHAP
    THURSDAY

    1. 5×3 Hang Snatch @ 72.5% (use straps)
    2. a. 5×3 Speed Squat (Pause @ bottom and explode up)
      b. 5×4 Snatch Grip Vertical Jump
    3. a. 4×3 Speed Reverse Lunge (Each leg)
      b. 4×4 Cycle Jumps
      c. 4×5 Sliding Hamstring Curls – Speed

    WEEK 3

    MONDAY

    1. 5×2 Clean Pull @ 90%, 95%, 100%, 105%, 110% of clean 1RM
    2. Front Squat: 6-4-3-3-4-6 @ 72.5%, 77.5%, 82.5%, 87.5%, 82.5%, 75%
    3. a. 3×6 Reverse Lunge @ 47.5% Back Squat 1RM (Each leg)
      b. 3×4 Romanian Deadlift @ 70% of regular DL
      c. 3×6 – GHR AHAP
    THURSDAY

    1. 5×3 Hang Snatch @ 75% (use straps)
    2. a. 5×3 Speed Squat (Pause @ bottom and explode up)
      b. 5×4 Depth Jump
    3. a. 4×3 Speed Reverse Lunge (Each leg)
      b. 4×4 Single Leg Box Jump
      c. 4×5 Sliding Hamstring Curls – Speed

    WEEK 4

    MONDAY

    1. 5×2 Clean Pull @ 95%, 100%, 110%, 110%, 110% of clean 1RM
    2. Front Squat: 4-3-2-2-1 @ 80%, 85%, 87.5%, 92.5%, 97.5%
    3. a. 3×4 Reverse Lunge @ 50% Back Squat 1RM (Each leg)
      b. 3×4 Romanian Deadlift @ 75% of regular DL
      c. 3×5 – GHR AHAP
    THURSDAY

    1. 5×3 Hang Snatch @ 75% (use straps)
    2. a. 5×3 Speed Squat (Pause @ bottom and explode up)
      b. 5×4 Depth Jump
    3. a. 4×3 Speed Reverse Lunge (Each leg)
      b. 4×4 Single Leg Box Jump
      c. 4×5 Sliding Hamstring Curls – Speed

    WEEK 5

    MONDAY

    1. 5×2 Power Clean @ 75%, 80%, 85%, 90%, 90%
    2. 2. Front Squat: MAX (3 min rest after sets above 75%) 8, 5, 3, 2, 1, 1, 1, 1 @ 45%, 55%, 65%, 75%, 85%, 90%, 95%, Max
      Then 5×2 @ 85%
    3. a. 4×2 Deadlift @ 90%
      b. 4×3 Reverse Lunge @ 52.5% Back Squat 1RM (Each leg)
      c. 4×3 – GHR AHAP
  • Tips for Crossfit Open Workout 15.3

    Watch this video to hear our tips for Crossfit Open workout 15.3

  • Mo’ Money, Mo’ Problems with 15.2

    As Biggie Smalls said back in the day, “it’s like the more money we come across the more problems we see.” In 15.2, the mo’ pull ups and squats you can do, the mo’ problems you have. And all of a sudden, within one round those more reps are going to jump on you. The key to doing well in this workout is completing the Money Maker Round.

    The weird part is the ease of the first rounds. You are going to start the workout doing something relatively easy and stand there for 90 secs. For a lot of you the 2nd and maybe even the 3rd round is going to be easy. Then what I call the “money maker” round happens. This is the round that everything changes. It happens quick, and you better be ready for it if you want to move past it.

    Money Maker Round and how to get through it – Let’s take an athlete that has a shot at making it through three rounds. The first round is going to be easy. Maybe 90 secs of rest. The second round is going to be fairly easy. Maybe 60 sec of rest. This athlete paced nicely by breaking up pull ups way before failure and is taking plenty of time between movements. The next round is not going to be so pretty. It changes that quick. AND YOU MUST BE READY FOR IT. You must instantly change your mind set, attitude and every which way you look at this workout. It’s time to switch the music from Ryan Bingham to Drake (get someone to actually do that for you). For this athlete, the Money Maker round is the 3rd round. It must be looked at like an entirely different workout. It’s the playoffs. You’ve been lolly gagging through two rounds with the JV squad (which was fine, that’s the plan) but now it’s time to step it up. This will be three minutes all out — think of Fran. Sure you are still going to follow broken rep schemes but there is no more breaking overhead squats because your legs burn a little or walking away from the pull up bar between reps. You have got to stay on it if you are going to advance. Now, this round may be round two, four or five for some of you. But it’s going to happen. I’ve never seen a workout where your mindset must change so drastically. This paragraph might have had some repetitiveness, but it is crucial that you understand the change at the Money Maker round and adapt. Don’t let the Money Maker Round be the last round. I’ll call the last round…um, Hell. So here is some advice on making it through.

    Muscle endurance plays the biggest role here. How do we delay fatigue? Here are four points:

    1. Break up your reps

      Break them up early. Most of you should be fine on overhead squats. Pull ups will be the issue. There is no reason to rush through the first rounds. It’s like running a 400m every 3 minutes for as long as possible. You wouldn’t go out and sprint it then rest 2 minutes. You would pace yourself. Here are some rep strategies (This is only a suggestion. If you see another strategy you like better, go for it.). Never, never, never go close to muscle failure unless you are trying to beat the clock at the end.

      Plan to complete 2 rounds:

      Rd1 : 6 – 4 ohs & 3-3-2-2 pull ups/6-4 ohs & 2-2-2-2-2 pull ups
      Rd2: 6 – 6 ohs & 3-3-2-2-2 pull ups/4-4-4 ohs & 3-3-2-2-2 pull ups
      Rd 3: Go for it!

      Plan to complete 3 rounds:

      Rd1 : 10 ohs & 5-5 pull ups/10 ohs & 5-5 pull ups
      Rd2: 12 ohs & 6 – 6 pull ups/12 ohs & 6-3-3 pull ups
      Rd 3: 14 ohs & 7 – 5 – 2 pull ups/8 – 6 ohs & 5-4-3-2 pull ups
      Rd 4: Go for it!

      Plan to complete 4 rounds:

      Rd1 : 10 ohs & 5-5 pull ups/10 ohs & 5-5 pull ups
      Rd2: 12 ohs & 6 – 6 pull ups/12 ohs & 6-6 pull ups
      Rd 3: 14 ohs & 7 – 7 pull ups/14 ohs & 5-5-4 pull ups
      Rd 4: 16 ohs & 7 – 5- 4 pull ups/10 – 6 ohs & 5 – 4 – 3 – 2 – 2 pull ups
      Rd 5: Go for it!

    2. Delay muscle fatigue by good mechanical position

      That’s why you may need to wear your Oly shoes. It gives you that upright torso and external rotation to save your shoulders. It’s all about getting through the overhead squats; not as fast but as efficiently as possible.

    3. Test out a closer grip on overhead squats

      If it feels comfortable, use it. It will save your shoulders.

    4. Keep the crease of your elbows up during overhead squats — external rotation.

    The mental aspect could be one of the toughest there has been. One, because of the drastic change. Two, because the better you do, the more it’s going to hurt. You know what they say…”Mo Money, Mo Problems.” The biggest part is being prepared for the mental side. Envision yourself changing pace for the Money Round. See yourself getting those last 3 reps on pull ups just in time to get to the next round.

    Other quick tips

    If you can full snatch the weight and immediately be in a good position, do it. If it takes you a few reps to settle in with a snatch, just power snatch it. The 2 seconds saved is not worth doing 3 reps with poor mechanics.

    Take care of your hands! Half the athletes I’ve worked with ripped on this workout. Most of these athletes said they never rip.

    When you get to the Money Round or start having trouble on pull ups, do not rest after overhead squats. Immediately knock out a few pull ups even if it’s just 2 or 3. That will give you an extra 10 seconds of rest between later pull up reps, which is huge.

    You may not realize it until you’re finished, but grip strength plays a huge factor. Do everything you can to save it. Hook grip in the pull of the snatch then lightly grip the bar overhead.

    Tight, tight, tight hollow body on pull ups!!

    Do not set the bar down on overhead squats. Simply drop it to your back to rest when needed.

    Breathing! You hear this all the time, but don’t brush over this paragraph. Breath at the top and bottom of squats. I bet you have never paid attention to your breathing in pull ups. In warm ups, develop a pattern and stick to it. Have someone remind you of your breathing pattern during the workout.

    Warm up

    30 minutes should do here. And it is going to be very specific in terms of energy systems used during 15.2.

    1. Row 3 min at an easy pace
    2. Banded shoulder, lat and ankle mobility for 8 -10 minutes.
    3. Row: 3 rounds of 30 sec slow, 30 sec at 500m race pace (this will simulate the workout)
    4. Barbell Complex with 45/35
      5 rounds of 3 power cleans, 3 front squat, 3 press, 3 back squat, 3 behind neck press
    5. Row: 2 rounds of 30 sec slow, 30 sec at 500m pace (2 min total)
    6. Barbell Complex with 45/35
      2 rounds of 5 reps of muscle snatch, snatch press behind neck, overhead squat, snatch balance, sots press, full snatch
      Complete 6 -10 ring rows after each round
    7. Row: 1 round of 30 sec slow, 30 sec at 500m pace (2 min total)
    8. Workout specific:
      2 rounds:
      5/3 CTB pull ups
      5 overhead squats
  • Clean Video Analysis

    How to use video analysis software such as Coach’s Eye and Ubersense to analyze technique for a clean.

    In this video, we break down the technique of a clean of CrossFit Games Athlete Dani Horan. Below is a checklist you can use at home when breaking down other athletes’ technique.

    Starting Position

    • Measure grip
    • Place feet hip width apart with toes just slightly pointing out
    • Place bar over the middle of the metatarsals bones (bar should be touching shins or almost touching the shins)
    • Secure the grip (hook grip)
    • Set the back: pinch shoulder blades together, create a steel rod in the back, chest out
    • Hips raised slightly higher than knees
    • Eye level looking straight ahead
    • Shoulders slightly over (ahead) bar
    • Slight arch in lower back
    • Pressure in the foot is placed on the back of the ball of the foot
    • Elbows pointed out towards the end of the bar
    • Wrists curled in

    First Phase of the Pull (moment bar leaves floor until bar reaches knees):

    • Take a deep breath
    • Use legs coming off the ground (push the platform down with your legs)
    • Total body position remains constant and the only body parts extending are the legs
    • Hips and shoulders move at the same rate
    • Keep arch in the back
    • Eye level straight ahead
    • Wrist curled in
    • Elbows pointed out to bar
    • Pressure is on the back of the ball of foot
    • Keep bar in close to the legs throughout pull (keep pulling bar back toward body)
    • Keep arms straight (like steel ropes)

    Second Phase of the Pull (as bar passes knee and until bar reaches hips)

    • Keep arch in the back
    • As bar crosses over the knees, hips are activated and brought forward while the bar is swept into the body until the bar reaches the power position (upper third of the thigh)
    • Eye level straight ahead
    • Wrists curled in
    • Elbows pointed out to bar
    • Pressure changes from back of the ball of foot to middle of foot and closer to heel
    • Bar will brush the thighs throughout the finish of the pull
    • Keep arms straight (like steel ropes)

    Third Phase of the Pull: (Jump Shrug)

    • At the power position hips are now brought forward and up to transition into the jump shrug (scoop)
    • At the moment of the hips being brought forward and up, the athlete directs the motion straight up by changing pressure from middle of the foot to the toes while shrugging shoulders to ears with knees fully extended
    • It is important that the direction of the motion is straight up and not forwards or backwards
    • Elbows must never bend in t
    • he pull especially during this phase (Elbows bend…Power Ends!)

    • Eye level straight ahead
    • Wrists curled in
    • Elbows pointed out to bar
    • Keep bar in contact with legs throughout pull
    • Finish the pull
    • Make sure athlete gets as tall as possible with big shrug (“Pinch that pull”)
    • Bar stays close to body after final explosion occurs (“Keep bar under chest”)
    • Do not come up on toes too soon during pull. “Stay flat footed as long as possible” to generate maximal power.

    Receiving of the Clean:

    • After full extension at end of pull phase shift feet out from hip width to shoulder width for catch – shift not jump
    • Bar travels straight up your chest
    • Rotate elbows up under bar to front squat position as fast as possible “Rack It”
    • Catch with 4 or 3 fingers in contact with bar
    • On catch meet the bar and guide it down – do not drop under.
    • This will lead to bar crashing on shoulders and the lift being missed and/or injury

    • Keep lower back tight for catch/chest up
    • Stand up like front squat and reposition if necessary for jerk phase
  • In physics, angular momentum (in simple terms) is the product of mass of an object (m), the distance of the object from the center of rotation (r) and the tangential velocity of the object (v):

    L = m * r * v

    Angular momentum is conserved unless there is external torque (force). In other words, m, r or v can change, but L will stay the same. Therefore when you decrease the radius of a rotating object, the velocity must increase to conserve angular momentum. If this doesn’t make sense, don’t worry, just trust me. This is why when a gymnast tucks their legs, they rotate faster and when a skater pulls their arms in, they spin faster.

    So what does this have to do with CrossFit? Everything. Moving your body in space requires that you operate within the laws of physics; thus it is beneficial to know what the rules are. Let’s take toes-to-bar (TTB) for instance. When we “kip” (or arch and hollow in a pendular fashion) to do a TTB, we all know from experience that bending our knee joint makes our legs seem to go up easier. That is because you are decreasing the radius of our legs (r). Since angular momentum (L) is conserved and the mass of our legs (m) is constant, the velocity of our legs increases. So bent legs is better right? Only if you do it the right way.

    From the back swing (or arch) you have two forces working in your favor 1) gravity and 2) your body’s natural elastic recoil. At this point, gravity, the elasticity of your muscles/tendons/ligaments, as well as whatever contractile forces of torso and shoulder flexion you apply all accelerate your body from zero velocity at the full backswing to whatever velocity you reach at the bottom of the swing. Since passive forces (gravity and elasticity) that don’t require your own ATP are helping you gain momentum, it is to your distinct advantage to keep your legs straight. Then after the bottom of the swing you have zero elastic recoil to use and gravity is working AGAINST you. Therefore to resist the force of gravity, if you bend your legs you will increase your velocity since the momentum you have stored up is conserved. Then your toes touch the bar and what happens then? You start to fall into the back swing and you have gravity working for you again. So you want STRAIGHT legs again. This allows you to build up more momentum in the back swing so that you can arch deeper. A deeper arch = more potential for elastic recoil and gravity to help the next front swing = you have to use less muscle.

    Although this is a very simplified form of physics as this is not a true fixed axis rotation, I would contend that the optimal body form is… OK HERE IS THE POINT FOR ALL OF YOU GETTING A HEADACHE…

    Straight legs and deep arch with shoulders in front of the bar, forward swing and accelerate with straight legs until through bottom of swing (hanging vertical), then bend legs as they come up until they touch the bar, then straighten them again as they fall back down into the straight leg deep arch again.

    That being said, this is generally not what I do. Unless I am doing more than 30-40 TTB in a row and my abs aren’t fatigued, I find it easier to just do long straight leg swings inhaling deeply in the back swing and exhaling deeply in the front swing. I find that with a very deep arch the acceleration provided makes the TTB so easy that the knee-bend isn’t necessary for me (and thinking about the bending then straightening keeps me from relaxing through the motion). TTB are a little slower this way, but much, much easier. If my abs get fatigued then I bend my knees as above.

    My rule of thumb is that if you can’t hold a conversation while you are doing TTB then you are probably working too hard and not taking advantage of your swing and physics.