Uncategorized

  • Body Positioning: Headstand

    Anyone who has been around me long enough in the gym has undoubtedly witnessed the awesome force of one of my CrossFit gymnastics nerd rants. These rants generally involve my frustration with the widespread disregard for the basics before learning more advanced skills. To make my point, my favorite analogy usually goes something like this:

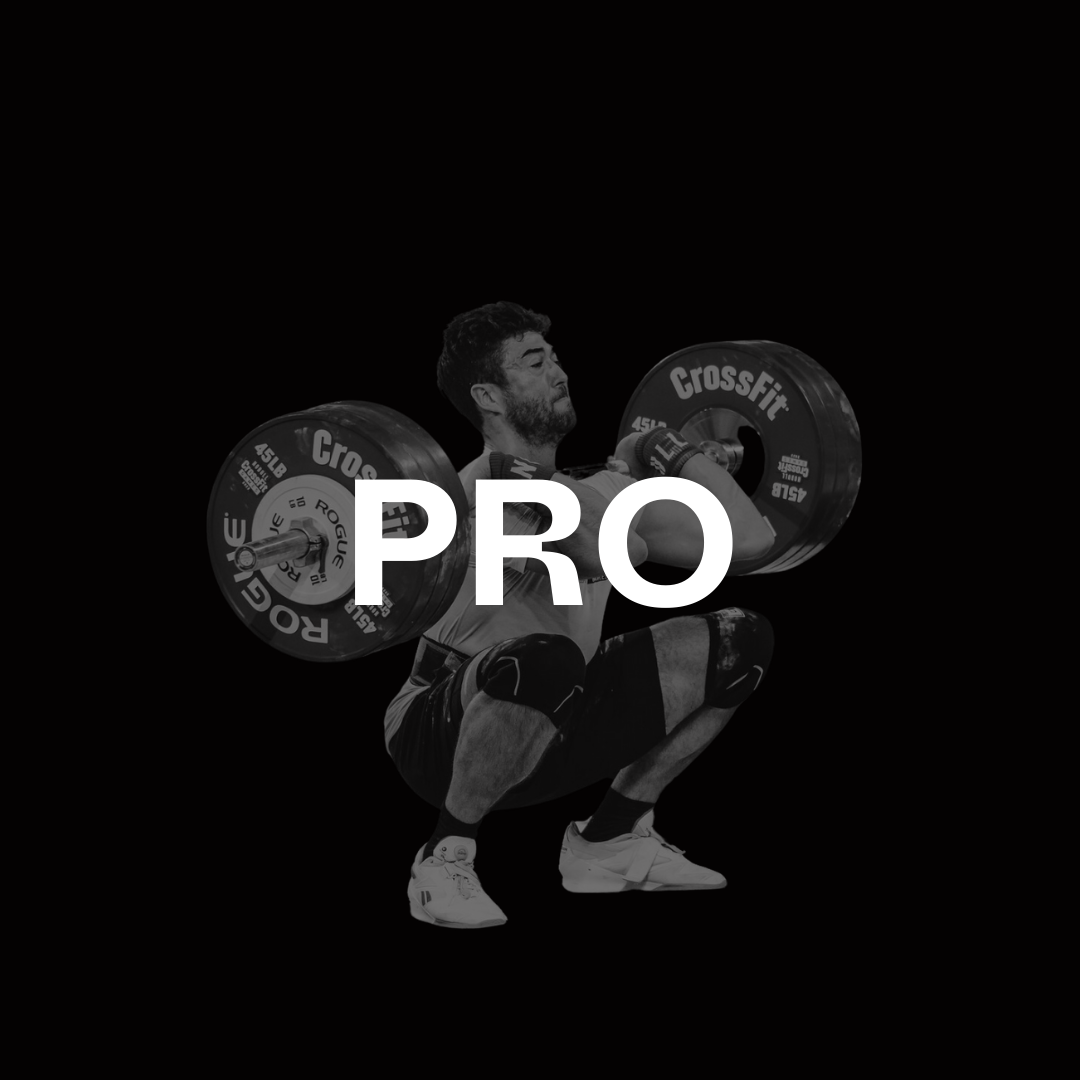
    Imagine a scenario of someone who is fit but has never lifted weights and walks into a CrossFit gym. This person says, “I would like to do a squat snatch please.”

    “Can you demonstrate a proper overhead squat or even a proper air squat?” is the concerned and conscientious reply.

    “Nonsense,” the new athlete says, “now hand me that barbell and stand aside… I have some work to do.” Said person would be promptly tarred, feathered and run out of the gym in a whirlwind of righteous exercise geek fury.

    Now imagine a scenario of someone who is fit but has never done gymnastics. This person walks into a CrossFit gym and says “I would like to try some handstand push-ups please.”

    “Sure, the wall is right this way,” is the reply. Then said grown person proceeds to aggressively slam his or her feet against the wall and start pushing out reps of an exercise that involves letting the entire body mass fall 12 inches onto the head and cervical spine. Rather than being reprimanded for not following the proper progression of skill development, this person is high fived for ‘PRing.’

    I am in no way trying to compare the handstand push-up (HSPU) to the full snatch, which in my opinion is one of the most difficult moves in all of sports to execute properly. But if you’ve spent enough time around CrossFit, you can definitely recognize the above scenarios and see the disparity in the way we approach gymnastics versus Olympic weightlifting.

    All young gymnasts learn how to do a HEADstand before learning a HANDstand in the same way we all learn to crawl before we learn to walk, and we all learn to air squat before we learn to squat snatch. In gymnastics, a HSPU is not a skill but rather a strength training exercise. If you are not at the level to do a proper headstand, then you are not at the level to require this strength training exercise.

    Every time I go to a different gym and help out with gymnastics skill development I’m met by a myriad of people who proudly proclaim, “I can do 15 kipping handstand push ups… high five right?” But then when I ask them to demonstrate a free headstand they look at me like I asked them to discuss the theory of relativity and proceed to try and balance and fall for 10 minutes like Bambi on ice. Be better than that. Be smarter than that. Decide to pursue excellence by deciding that the patience of virtue and goal setting is better than the elation of the moment. And for the sake of all that is holy, work your headstands!

    A properly executed headstand involves placing your hands in front of your head so that the position of your hands and head make a tripod or three-legged stool configuration. This is the only way to balance properly. You should be able to start from your feet and slowly transfer your center-of-mass over your head and hands with such control that you can stop and hold at any point along the way. If you can balance properly in a headstand, keep your elbows/shoulders internally rotated; then pressing out into a free HSPU is just a matter of working on your pushing strength. Repeating HSPU is a just a matter of working on your free handstand balance. Bottom line: you have to work the basics.

  • Meet Me at the Bar

    Many lifters have the problem of letting the bar crash on them during the clean. Lifters feel they need to drop under the weight as fast as possible in order to lift the most weight.

    This, however, is not true.

    In this first image, you can see the lifter dropping too fast under the bar and, therefore, waiting for the bar to crash on them:

    This, in turn, is like adding weight onto the bar. When the bar finally reaches the collarbone, the force of impact will be great. Also, the athlete will most likely be in his full depth squat upon absorption, and this will make his legs unable to absorb the weight. Many times this impact will cause the core to break down and the lifter to lose the bar out front.

    On the contrary, Olympic lifting coaches stress to their athletes to “meet the bar” and ride it down. Here are a few images of myself receiving the bar at the correct height, and then allowing my legs to absorb the weight:

    As a coach and athlete, what cues and drills can you use to help correct someone allowing the bar to crash on them? The easiest cue to use is to tell the lifter to bring their elbows around and up as fast as possible. If the athlete is focused on fast elbows, this will cause the lifter to meet the bar more efficiently. Another great cue is to tell the athlete to bring the bar to their collarbone as fast as possible. I know it sounds so simple, but it works. The best drill to correct this movement is to have your athlete revert back to power cleaning and then front squatting for a while. As the weeks progress, slowly advance the athletes to meeting the bar lower and lower while still riding the weight down.

  • Novice Athletes and Olympic Weightlifting

    The number of participants engaging in strength training has been steadily increasing among all levels and age groups of the global population. Therefore, it is becoming increasingly important to understand the implications and consequences of training novice and youth athletes. Coaches must have a sound knowledge base regarding the psychological, physical, and physiological changes occurring as a result of strength and conditioning programs. The purpose of this article is to review some of the potential ramifications of training as it pertains to novice lifters, especially for the sport of weightlifting.

    An athlete’s chronological and physiological age will have a direct effect on how the coach should construct his or her periodization. A younger athlete’s body can adapt more quickly to neural and hormonal responses from new external stimuli. Coaches may observe relatively large strength gains from baseline measures as a direct result of motor neuron recruitment and increased human growth hormone secretion in younger athletes. Due to these adaptations, coaches may utilize a linear periodization scheme when it comes to intensity and volume with their young beginners. However, older novice athletes will not adapt as quickly in terms of relative strength gains. Coaches may observe greater motor synchronization due to a learning effect, but the skeletal muscular system will require systematically placed recovery periods for optimal long-term progressions. Therefore, coaches should apply an undulating scheme for their older amateurs.

    The equipment available should also be considered when training novice weightlifters. Studies have indicated that free weights produce superior results, especially in terms of movement and sport specificity. Proper lifting technique must be a priority when instructing novice athletes, as poor mechanics will impede adaptation, limit performance gains, and stagnate progression. The first day an athlete begins Olympic weightlifting, the coach should introduce a general warm up, stretch, and then move straight to teaching the lifts using the holistic method. A holistic method approach includes teaching the easier large muscle lifts first, like the front squat and back squat, and then progressing to more explosive and technical lifts such as the Olympic lifts.

    The most important thing is to be patient. Athletes will want to increase the weight so they can compete with their friends or teammates. A good coach must be able tell them that they must get proficient with technique before they can max out. A good motto to coach by is, “never sacrifice technique for added weight.” Young athletes need to be trained using benchmarks. Instead of maxing out, young athletes should focus on surpassing a benchmark of a best set of 8 or 5 with perfect technique. Once an athlete can perform all these reps with relative perfect technique, then the athlete will be allowed to set a new benchmark.

    In conclusion, strength and conditioning professionals should consider the evidence presented when prescribing a training program to youth and amateur weightlifters. Technique should be the main emphasis in a beginner athlete’s first macrocycles, with athletes focusing on setting benchmarks instead of one-rep records. Coaches can utilize Sinclair scores and experienced lifters as a way to motivate new athletes. Additionally, coaches must constantly monitor their novice lifters in order to account for physiological adaptations.

  • The New CrossFit Open: The Easy Way Out

    Recently, there have been drastic changes to the CrossFit Games qualification process that directly affect each and every person who has aspirations not only to qualify for the Games, but even to participate in the Open. Moving forward there will be an elite or competitive division, as well as a scaled division. In years past everyone did the same workouts no matter the skill level, experience, or overall goals. The change is necessary and will lead to a more accurate way to crown the “fittest” as the sport continues to grow in participation, and as the abilities of the athletes increase.

    What does this tell us about the Open? It brings us to a clear hypothesis that the open workouts will be that of high skills, higher weights, and endless options of tasks for the programmers to test (now even at the first qualification stage). This alone has turned many excited, eager athletes into worried, bitter, paranoid athletes with spiteful feelings towards the Open.

    If that information isn’t enough to put your fitness “panties” in a bunch, well then let us look at the fact that there will be half the number of athletes representing each region at the Regional competitions across the world! The top 20 athletes from each region through the open will be the chosen few who get to compete for a spot to go to the CrossFit Games. No more top 40-45 athletes hoping for a shot at the big stage of Regionals, and only half the number of Regional competitions in general, as the top 20 from each region will compete across regions in the appointed “Super Regional.”

    I coach many athletes, both at my gym and remotely online. When Dave Castro dropped the bomb of how this year’s Open and Regional format would be set up, I almost immediately received texts, emails, and even phone calls basically saying, “What now?” Many of the athletes I train are not the top regional competitors and some have never made it to Regionals, which means most of these athletes were dreaming of that 40th spot during the Open. This new information crushed them emotionally, even left some wondering if continuing to train as hard and invest as much into their training was even worth it.

    I stopped all of my athletes with a question in response: “What is your goal?” All of them replied the same: to prepare themselves in such a way to qualify for regionals. I assured all of my athletes I would support any decision they made, but that the change of the qualification process did not change their goals and they should not allow it to. Why do you show up each day at the gym? Why do you step outside of your comfort level to lift heavier weights or to fight and claw for 1 less second on that metcon? You do so because it makes you better, not only as a competing athlete but as a person. Growth. Instead of now aiming for the top 40, athletes must now have their eyes set on the top 20 in order to qualify. A change in perspective to say the least. So now should we all quit because we don’t have a chance? Absolutely not. We should train in such a way to make the top 20 and let the fittest sort themselves out. We should do whatever we can to end up where we’d like to be, and let the rest take care of itself – be proud of what we accomplish, and move upward and onward.

    I love the changes and feel as though it is necessary as the sport continues to adapt. Is it fair or perfect? Nope, but neither is my life and yet I think it’s pretty darn awesome. Don’t be ashamed to set your goals high this season, let it all hang out. I sat out of Regionals last year with an injury, and going forward my goal is to be at Regionals, to win my perspective region, and to go onto the Games to seek the podium. I am not ashamed or embarrassed to say that. If those things don’t work out that way due to injury, or simply because others are better at the tasks at hand, then I will tip my hat and root them on as they go! I will go back to the drawing board, and begin the process again. Oh wait…shame on CrossFit for forcing us again to aim a bit higher than we planned!

    The changes this year may leave many people not participating in the Open, or not training as hard because they “don’t have a chance.” Don’t find the easy way out this year. Participate to the highest level you can, find new holes in your fitness, and enjoy the challenge of making them disappear.

    Best of luck!

  • How to Make 2015 Your Worst Year Ever

    At the beginning of a new year you dream big, write goals, make a plan of action and tell friends what you will accomplish. And then December arrives. Nothing has happened. Nothing has been accomplished. It’s disheartening to put only one check mark next to a list of 15 goals.

    January 2014 was filled with hopes and dreams of an amazing year. Nothing too bad happened this year – but surely nothing great happened.

    What went wrong?

    You may have paid attention to your goals all year and tried to have action plans; but for some reason, it still didn’t work.

    Or, perhaps you spent some effort on the front end. You set SMART goals, followed the 10 Goal Setting Steps or whatever. The plan was set in January, you were on fire in February…and then you never looked at the goals again after March.

    Either way, it sucks. It’s disheartening. Why would you ever go through planning and writing down goals again? You know what you want to accomplish. It’s in your head, and you don’t want to be stifled by something in writing (what if your goal changes?).

    Are you on this track for 2015?

    A process that works (But that most people will never do)

    I’m going to give you a goal-planning process to help turn your upcoming year around in regards to setting and achieving goals – but it’s not for everybody. Actually, 97 out of 100 people would never do this. It takes work, effort, time and dedication. Some of the process is fun (thinking big and checking off accomplishments). Some of it, not so much (putting in the back-end work and planning your week in advance).

    If you’re a BrUTE Strength athlete (or 1 of 2 other groups I’m writing this for), you work your butt off everyday to be your best. I see your workouts. I see what you eat. I see the sacrifice. The goal-planning process below is designed for people like you.

    I could have drastically decreased the length of this post to increase readership. But again, this process is not for everyone. I’d rather have 10 people find success from this post than have 1,000 people skim through it.

    The Plan

    Zig Ziglar taught the basis of these steps to me 10 years ago and it changed the course of my life. A few years ago I met Ari Weinzweig, founder of Zingerman’s, and he tweaked a few things in the initial steps. Anyway, over the years, this process has been refined to work for people like you and me.

    All of the following activities should be written. Don’t simply go through this in your head.

    1. Take a few minutes to write things you accomplished in 2014. What makes you proud?

    2. Take 15 – 30 min of quiet time and start brainstorming a first draft of your goals. Don’t hold back. It’s just a draft. Write things that are big. That may even scare you. Write from your gut. No one will see this draft. Don’t let yourself stop writing for 15 – 30 min. A good way to start the draft is by writing “I’m sitting here on Dec 31, 2014 at my house and this is what I have done in the past year….I made ‘x’ dollars, I snatched ‘y’, etc.” Don’t stop to think. Just keep writing.

      Write what you want to be, do and have.

      Include items in each of these 7 categories:

      • Personal
      • Physical
      • Family
      • Mental
      • Financial
      • Spiritual
      • Career

      The intent is to be well rounded at life. It’s important to have goals in each category. If life is excelling in the physical realm but lacking on the family side, you know where the focus should be placed this year.

    3. Wait 24 – 48 hours. Mark which category each goal falls under. Is there a discrepancy in overall balance? Is there anything to add or delete?

      Ask yourself “Why” about each goal. If you aren’t able to do it in once sentence, delete it. It is not something that needs to be done this year. Remember, write down all of this.

    4. Ask these 5 questions about each goal. All questions should receive a “yes”. Some of your goals will be eliminated.

      1. Is it really my goal? (Or is it something your friends, boss, parents or society think you should do)
      2. Is it morally right and fair to all concerned?
      3. Is it consistent with my other goals?
      4. Can I emotionally commit myself to finish this goal?
      5. Can I see myself reaching this goal?

      If you can’t answer yes to each of these, mark it off your list.

    5. Through this process, was there a goal that weighed on your mind? Maybe there were a few. “I want ‘x’ but do I have the time to invest?”; “I desire ‘y’ but it’s selfish; ‘Y’ is not going to have a real impact on my life.”

      There are likely one or two things you need to add or eliminate and you have no desire to do so. Things that require making sacrifices, or giving up desires that are ‘good’ but have no real impact on this world.

    6. Your list should be final now. Everything has been vetted. Although the list pushes your comfort level, you feel each goal is right for you.

      In step 6, you are going to put these goals into a format to be looked at each week in 2015. Rewrite them neatly on a note pad, type them, laminate it or write it on your bathroom mirror – whatever will make it easy to review once a week and keep fresh on your mind.

    To be successful, who should know your goals?

    A final thought: some of these are “give up” goals and some are “go up” goals. Give up goals would be those along the lines of “I’m giving up drinking…bread…gossip.” You need to tell everyone about these. Get some accountability. You’re less likely to go out partying if you’ve told a few respectable friends you are giving that up.

    Limit who you tell about your “go up” goals. Go up goals include those such as, “I will clean & jerk 300lbs this year,” or “I will start a business.” I suggest not telling anyone unless they are mentoring or coaching you to achieve the goal. Not only is it annoying to hear about all the amazing stuff you will accomplish but haven’t done yet, it can actually hurt your chances of accomplishment. Endorphins are released when telling people about this amazing thing you are going to do. The same endorphins are released when you actually accomplish it. That feeling is what drives you to accomplish the goal. If you get the feeling before it’s actually accomplished, you lose the drive, in turn reducing your chance at success.

    Take some time to go through this process. I’ll be doing a follow up post on how to successfully implement a process to achieve your goals and not lose focus during 2015.

  • Many people struggle with overhead movements, including the jerk. Listed below are 3 crucial jerk assistance exercises that are often overlooked:

    1. Torture Rack (Jerk Recovery)

    In this exercise, the lifter places a barbell in a cage rack such that it is supported about 5 inches over the head. Next the lifter splits themselves underneath the bar as if performing a jerk. However, the bar does not move off the rack until the athlete recovers their feet. The athlete can work up to 90-110% of their best jerk.

    2. Walking Lock-Outs

    In this exercise, the athlete split jerks the weight and recovers. After recovery, the athlete continues to hold the weight overhead as they walk forward and backwards on the platform. The athlete can work in a range of 70-93% of their best jerk with this exercise.

    3. Press from Torture Rack

    In this exercise, the athlete places a barbell in a cage rack such that it is supported about 5 inches over the head. Next the lifter presses from this position. The athlete can work between 40-60% of their best jerk with this exercise.

  • Elbows Bend, Power Ends!

    Elbows bend, power ends!

    My coach used to preach this day in and day out. In Olympic weightlifting, bending your elbows prematurely on the pull can cause some unwanted effects on positioning and movement of the bar

    When your elbows bend during the first or second phase of your pull, you automatically begin to lose power and velocity on the bar. An athlete typically bends their arms after the transition from the launch position (right above the knee) into the power position (bar coming into contact with the hips). Athletes tend to bend their arms early because they are trying to get the bar into the power position prematurely, instead of being patient. If the athlete can engage their latissimus dorsi and sweep the bar close to the body, they will not need to bend their arms in order to get the bar into the power position.

    Typically, when an athlete bends their arms, they are actually pulling themselves to the bar, rather than lifting the bar vertically. Henceforth the term, “elbows bend, power ends.” Once the elbows bend, the athlete loses the momentum of pulling the bar upward. This causes them to transition into the third phase of the pull (the “pull under”) too early before reaching triple extension.

    The easiest cue to fix this is to tell the athlete to curl their wrists down or point their knuckles down towards the floor. This will engage the tricep. If the tricep is slightly engaged as seen below, the lifter is less likely to bend their elbows using their bicep, and less likely to bend their arms while coming off the floor.

    This cue also helps position the athlete’s elbows such that they are pointed out to the ends of the bar. We all know that when we finish a lift, we need to finish with our elbows high and to the outside. If your elbows are pointed to the ends of the bar, this will allow you to finish your pull in close to your body.

    When the wrists are not curled in, many times this will leave the elbows pointing to the back and the triceps not engaged, as seen here:

    Therefore, when setting up your starting position for the snatch or clean, be sure to curl your wrists in and point your knuckles to the floor. One cue I like to use is to tell the athlete to think about revving up a motorcycle. Once the motorcycle is revved, you can then release the clutch, and come off the floor powerfully.

    Additional cues to use:

    • “keep your knuckles down”
    • “arms like steels ropes”
  • The Hook Grip: Do you need it?

    There is a two-point answer to this question. It is good practice to keep the hook grip whenever snatching or cleaning a weight. However, very rarely, it may not be the best choice.

    The only time I would not suggest using the hook grip is for high repetitions of snatches or cleans within a WOD, especially when the weight needs to go overhead then back to the floor extremely fast. Other than that, I suggest using the hook grip, especially while lifting heavy weights.

    To secure the hook grip, the athlete needs to grip the barbell and place one, two or three fingers around the thumb. Most athletes prefer the method shown here: two fingers placed over the thumb, with the thumb protruding slightly between the middle finger and ring finger.

    The hook grip is important because it helps keep the bar from sliding into the fingertips during the second phase (explosion phase) of the pull. The thumb helps keep the bar locked in place during the huge acceleration that is generated into the barbell during this phase.

    Many people attempt to hook grip the barbell but stop shortly after due to pain in the thumb or the inability to hold the thumb in place. There are a few methods you can use to help solve this problem.

    First, the hook grip is usually painful and awkward for only a few weeks. After a few weeks, the body tends to adapt the new grip, and sooner than later, you won’t even realize that you naturally grab the bar with the hook grip. One method to help speed this process is to hook grip a dumbbell in each hand and do farmers walks once a week for a total of 5 minutes.

    Another common problem is that athletes feel the hook grip sliding out. There are two solutions to this problem. The first is to tape your thumb like so:

    This tape will allow for additional grip for your fingers to hold. This is especially helpful if you have small hands. Make sure to use a tape that is very flexible and be sure to only use a minimal amount.

    Another method to solve the problem of the hook grip sliding is to grow your thumbnail out . I know this sounds odd, but many weightlifters are known to purposefully not cut or bite their thumbnail, solely because they feel it helps out with the hook grip.

    The hook grip is utilized for all lifts below the shoulders. On the clean, the hook grip is most commonly released when receiving the bar in the front rack. It is not suggested that you jerk with a hook grip because this can restrict the movement of the barbell while traveling overhead. On the snatch, you can either keep the hook grip throughout the lift, or you can release the hook grip on the turnover above the head. This is the choice of the athlete as to which feels more comfortable— neither is right or wrong. Most importantly, the hook grip should be utilized for cleans and snatches, especially when lifting heavy.

    Get into the practice of using it early, and it will just be one more tool in your toolbox to give you that extra advantage.

  • Touch-and-Go

    Touch-and-go has brought a new dimension to Olympic lifting. Many times the weight is light enough for the athlete to control easily and the focus is on speed. The three factors we will look at while addressing this issue are efficiency, speed and technique.

    While competing or training these exercises, speed is the major factor. Sometimes technique will suffer in order to increase speed. Being a strict Olympic lifting technique coach, it kills me to say that there can be some small technique breakdown in order to decrease the time of the activity.

    The only technique elements that can suffer are those that are crucial for maximal force and not necessarily needed for efficiency. One example is an athlete performing Isabel (30 snatches for time). While performing this WOD, it may not be crucial to shift your feet and receive the weight in a full bottom position. These elements of the movement are crucial when lifting maximal weight, but not necessarily beneficial for speed.

    On the other hand, efficiency plays a major role in performing these fast types of exercises. The athlete must have a proper starting position and must keep the bar extremely close to his/her body while completing the reps. If the athlete allows the bar to travel too far from the body, the athlete becomes much less efficient and must rely on muscles not usually needed to complete the lift. If one muscle group is overused, this will automatically result in early muscle endurance fatigue. For example, if an athlete stiff-legged deadlifts the snatch off the ground, this will put an added emphasis on the lower back, causing quicker muscle fatigue in that specific area.

    Let’s take a look at 2 different videos of Rich Froning. The first video shows Froning completing Isabel with the standard weight of 135lbs. If you scan to 11:45, you will see the start of his heat. In looking at this video, you will notice that his technique stays very consistent. He keeps the bar extremely close to his body and doesn’t just “muscle” the weight up. He is lifting the most efficient way possible, while still holding on to great technique.

    The next video shows Rich Froning peforming Isabel with 225lbs. Now that the weight has increased significantly, Rich must rely on technique for heavy lifting. He is now squat snatching the weight and shifting his feet. These small technical changes allow him to lift the heavier weight more efficiently, even though it may take him some more time.

    One thing I want you to take into consideration is that a 135lb Isabel is about 44% of his max, while a 225lb Isabel is about 73% of his max. He obviously has an extremely strong snatch max (310lbs); however,even though he is so strong, he still uses great technique while performing 135lb snatches. He understands that some technique can suffer in order to have a faster time, but that the flow of the lift needs to stay the same in order to increase efficiency.

    In conclusion, if time is of the essence and the weight is significantly lighter than your max, technique can suffer slightly–but only in one domain. Technique can only suffer in positions and movements that are needed for maximal effort lifts, but may require significantly more time (i.e. performing a squat clean on a touch-and-go clean). The aspect that must always be maintained is efficiency. This is key to allowing an athlete to complete multiple reps in the quickest possible time. Using too much of one muscle group can greatly hinder the muscle endurance of a continuous lift. Olympic weightlifting relies on the kinetic chain working together as an efficient machine, which requires all the muscle groups acting cohesively as a single unit.

  • Back Rounding

    Many Olympic lifts are made or missed the moment the bar separates from the floor. During this initial pull from the ground, it is crucial that the back stays completely flat and the lifter keeps a slight arch in their lower back.

    Many times lifters set themselves up in a good start position, but then lose their back posture as the weight leaves the ground. Most of the time this is due to a weakness of the posterior chain and, more specifically, the spinal erectors.

    To find the moment the lifter loses their position, a coach should instruct the lifter to deadlift the weight. Once deadlifted, the athlete must then set their back and slowly bring the weight back to the floor in the same position you would hold for a snatch or clean. At some point, usually below the knee, you will see the athlete’s lower back give way and begin to round. This moment, where their back begins to round, shows the coach and athlete that this is the position in which they become weak.

    The coach and athlete must now work on the weakness from this position and all positions below. One method is to set up blocks for the weight to sit on which allows the bar to start at the position of the body where the lower lumbar curves. The athlete then performs snatches and cleans from the blocks, reinforcing proper lower back positioning. It would also be beneficial for the athlete to perform pulls from these positions. As the weeks go by, the athlete and coach slowly lower the blocks. They must only lower them to a point that is very difficult for the athlete to keep their back from rounding. Once this positioning is found, the athlete must constantly drill this position and lift from this height with proper back positioning. It is far better to reinforce good position with proper loads than to overload the weight, causing the athlete to lose proper back posture. Once the athlete is proficient from a higher position, the coach can slowly lower that position, reinforcing the correct lower lumbar curve.

    Other exercises that will help strengthen the lower lumbar region and keep the back from rounding are:

    • Eccentric deadlifts
    • Deficit pulls
    • Pause front squats
    • Planks
    • Hyperextension hold